
They don’t make them like that no more.
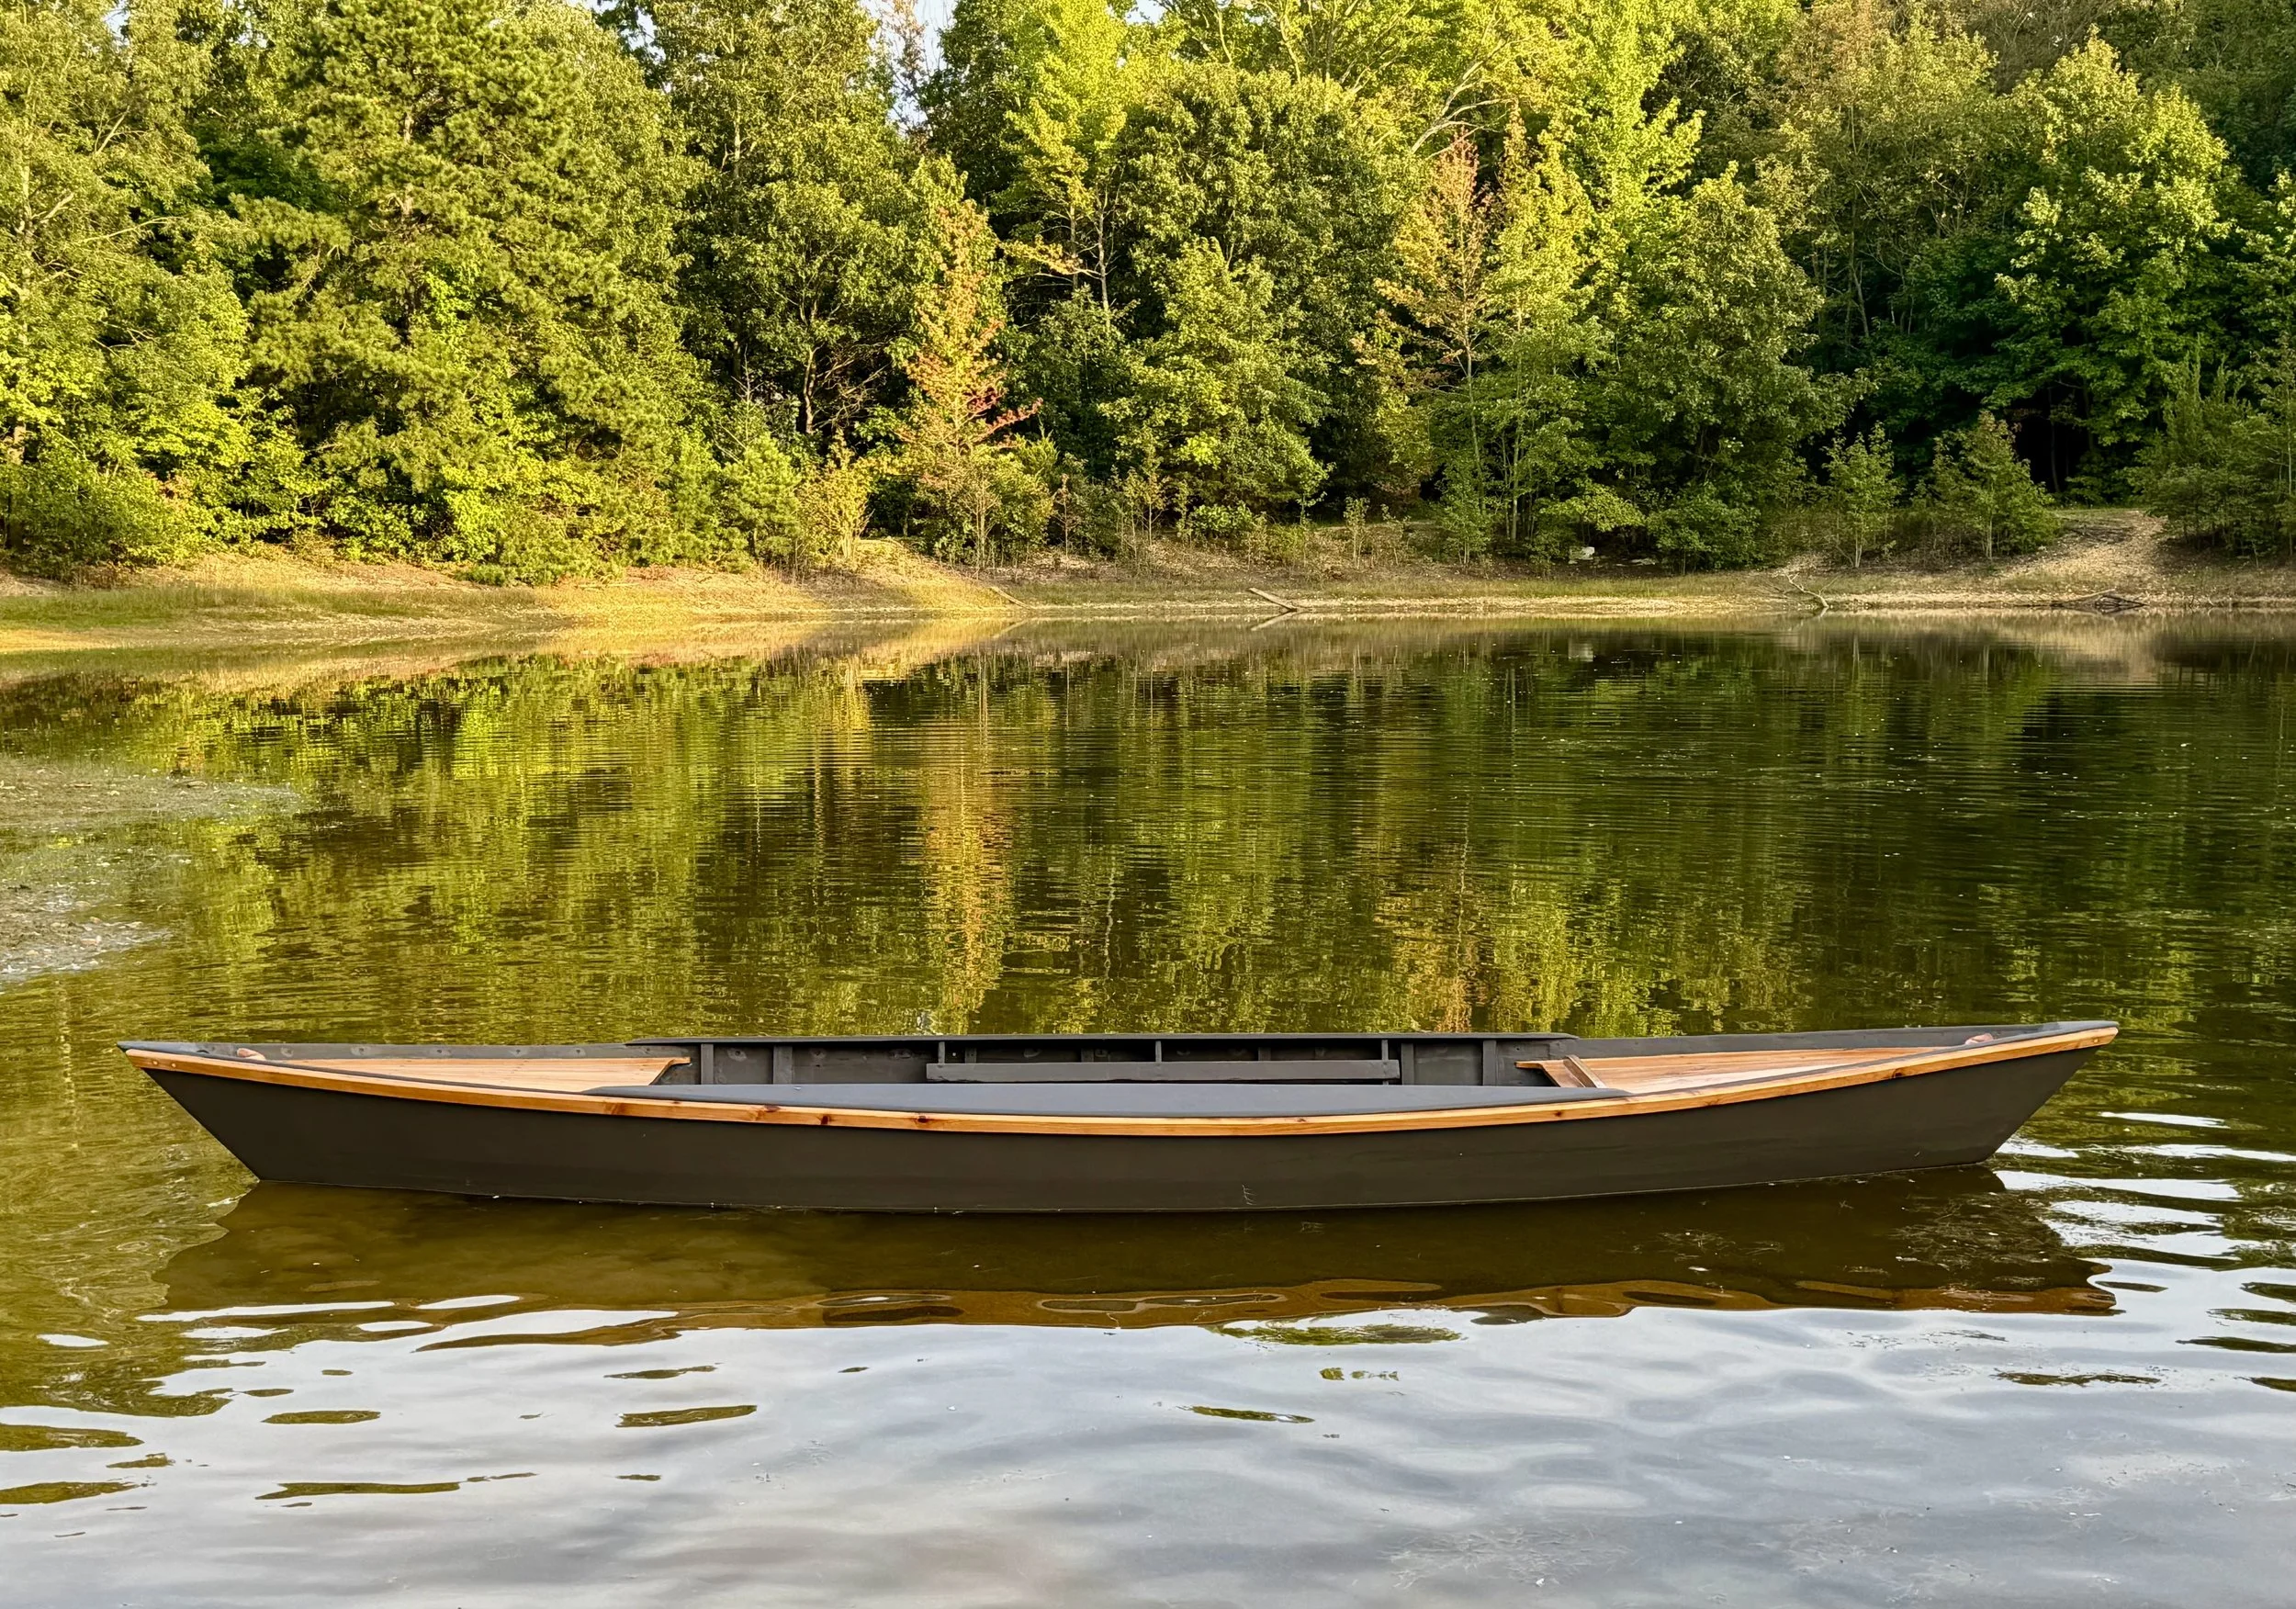
Restored mid-century rail Skiff. Original construction Alvin Beal from Lower Always creek New Jersey. Restoration by Jode Hillman
“They don’t make them like that no more.”
So goes the chorus of a popular country song. However, this rings true for many other things as well. In the context of this blog article, I would like to apply it to the mid-century railbird skiff that I recently restored.
It all started when a friend of mine sent me the link to a boat for sale on Facebook marketplace.
He had the notation "Looks like a Rail skiff" in the message.
As soon as I open the listing, I knew it was indeed a rail skiff . I also recognized the attributes that signaled the builder as Alvin Beal from Lower alloway's Creek in southern New Jersey. I have owned skiffs built by Alvin before. I recognized the lines instantly. These boats were widely used for trapping muskrats, shooting Railbirds, as well as catching crabs, minnows and bait fish. It was, and is, a utilitarian craft used in the winding maze where the Delaware river meets the Delaware Bay in Salem County, New Jersey.
Long before production boats were available local baymen built watercraft suited to meet their needs. I'm always struck by just how much these local South Jersey boats share design similarities with the Pirogues of deep south Louisiana. Other than some minor construction details, they often mirror each other in size, length, and purpose.I guess it is true that form follows function.
As I perused the listing I noted the price of the skiff was not exorbitant, but it defiantly looked like she was in need of repair. I decided that I would go look and try to acquire it if I could. I recruited my friend Adam to go with me.
After a short drive south we arrived at the location. We exchanged pleasantries. after further conversation the boats owner said his son had used it for bass fishing and cruising around local freshwater lakes. He added that his son had moved out over 10 years ago and the boat had been sitting behind the garage gathering dust. I asked him if he knew what the true purpose of boat was, to which he replied
"I have no idea".
I informed him of its local lineage and purpose, and to the roots that the builder had in the area.
(The boat was located no more than 3 miles from where it was originally constructed.)
However He wasn't too impressed and it didn't matter much to him. He just wanted it gone and out from behind his garage! We settled upon a price and I soon had it loaded up in the back of my pick up truck, headed for home and greener pastures.
Once I got home, I was able to analyze it and inspect it better.
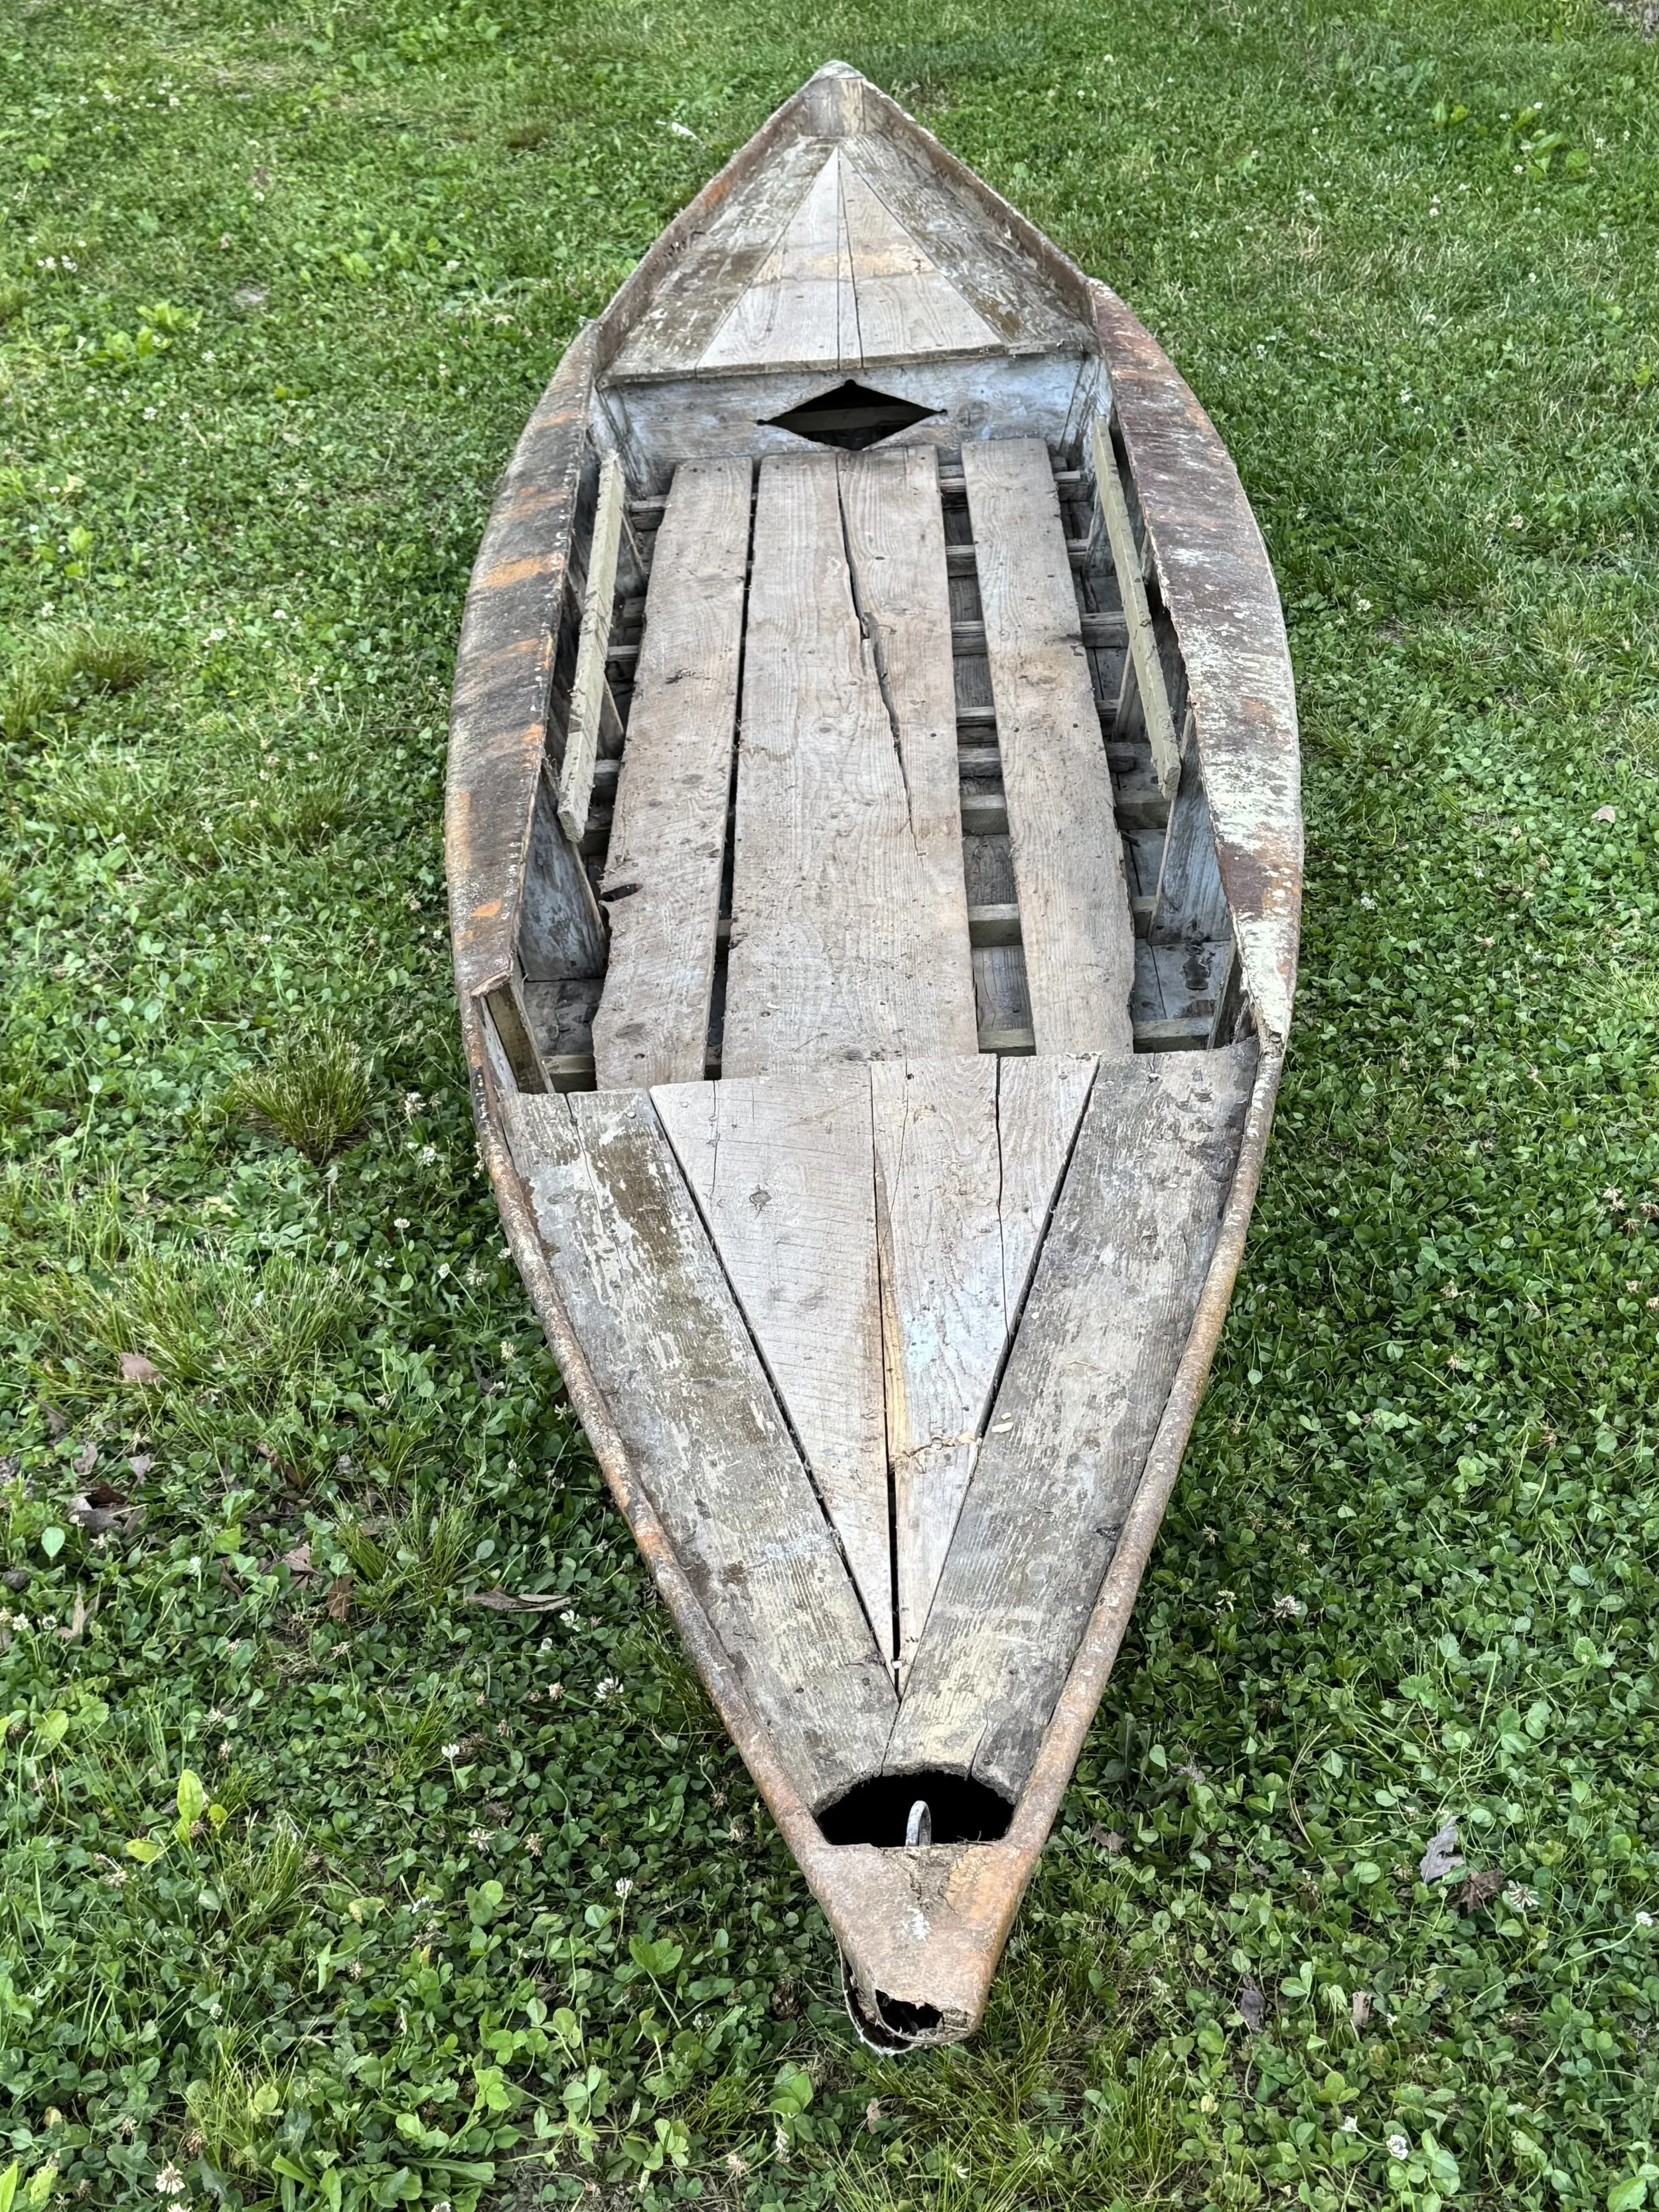
The railbird skiff original condition as it arrived at my shop
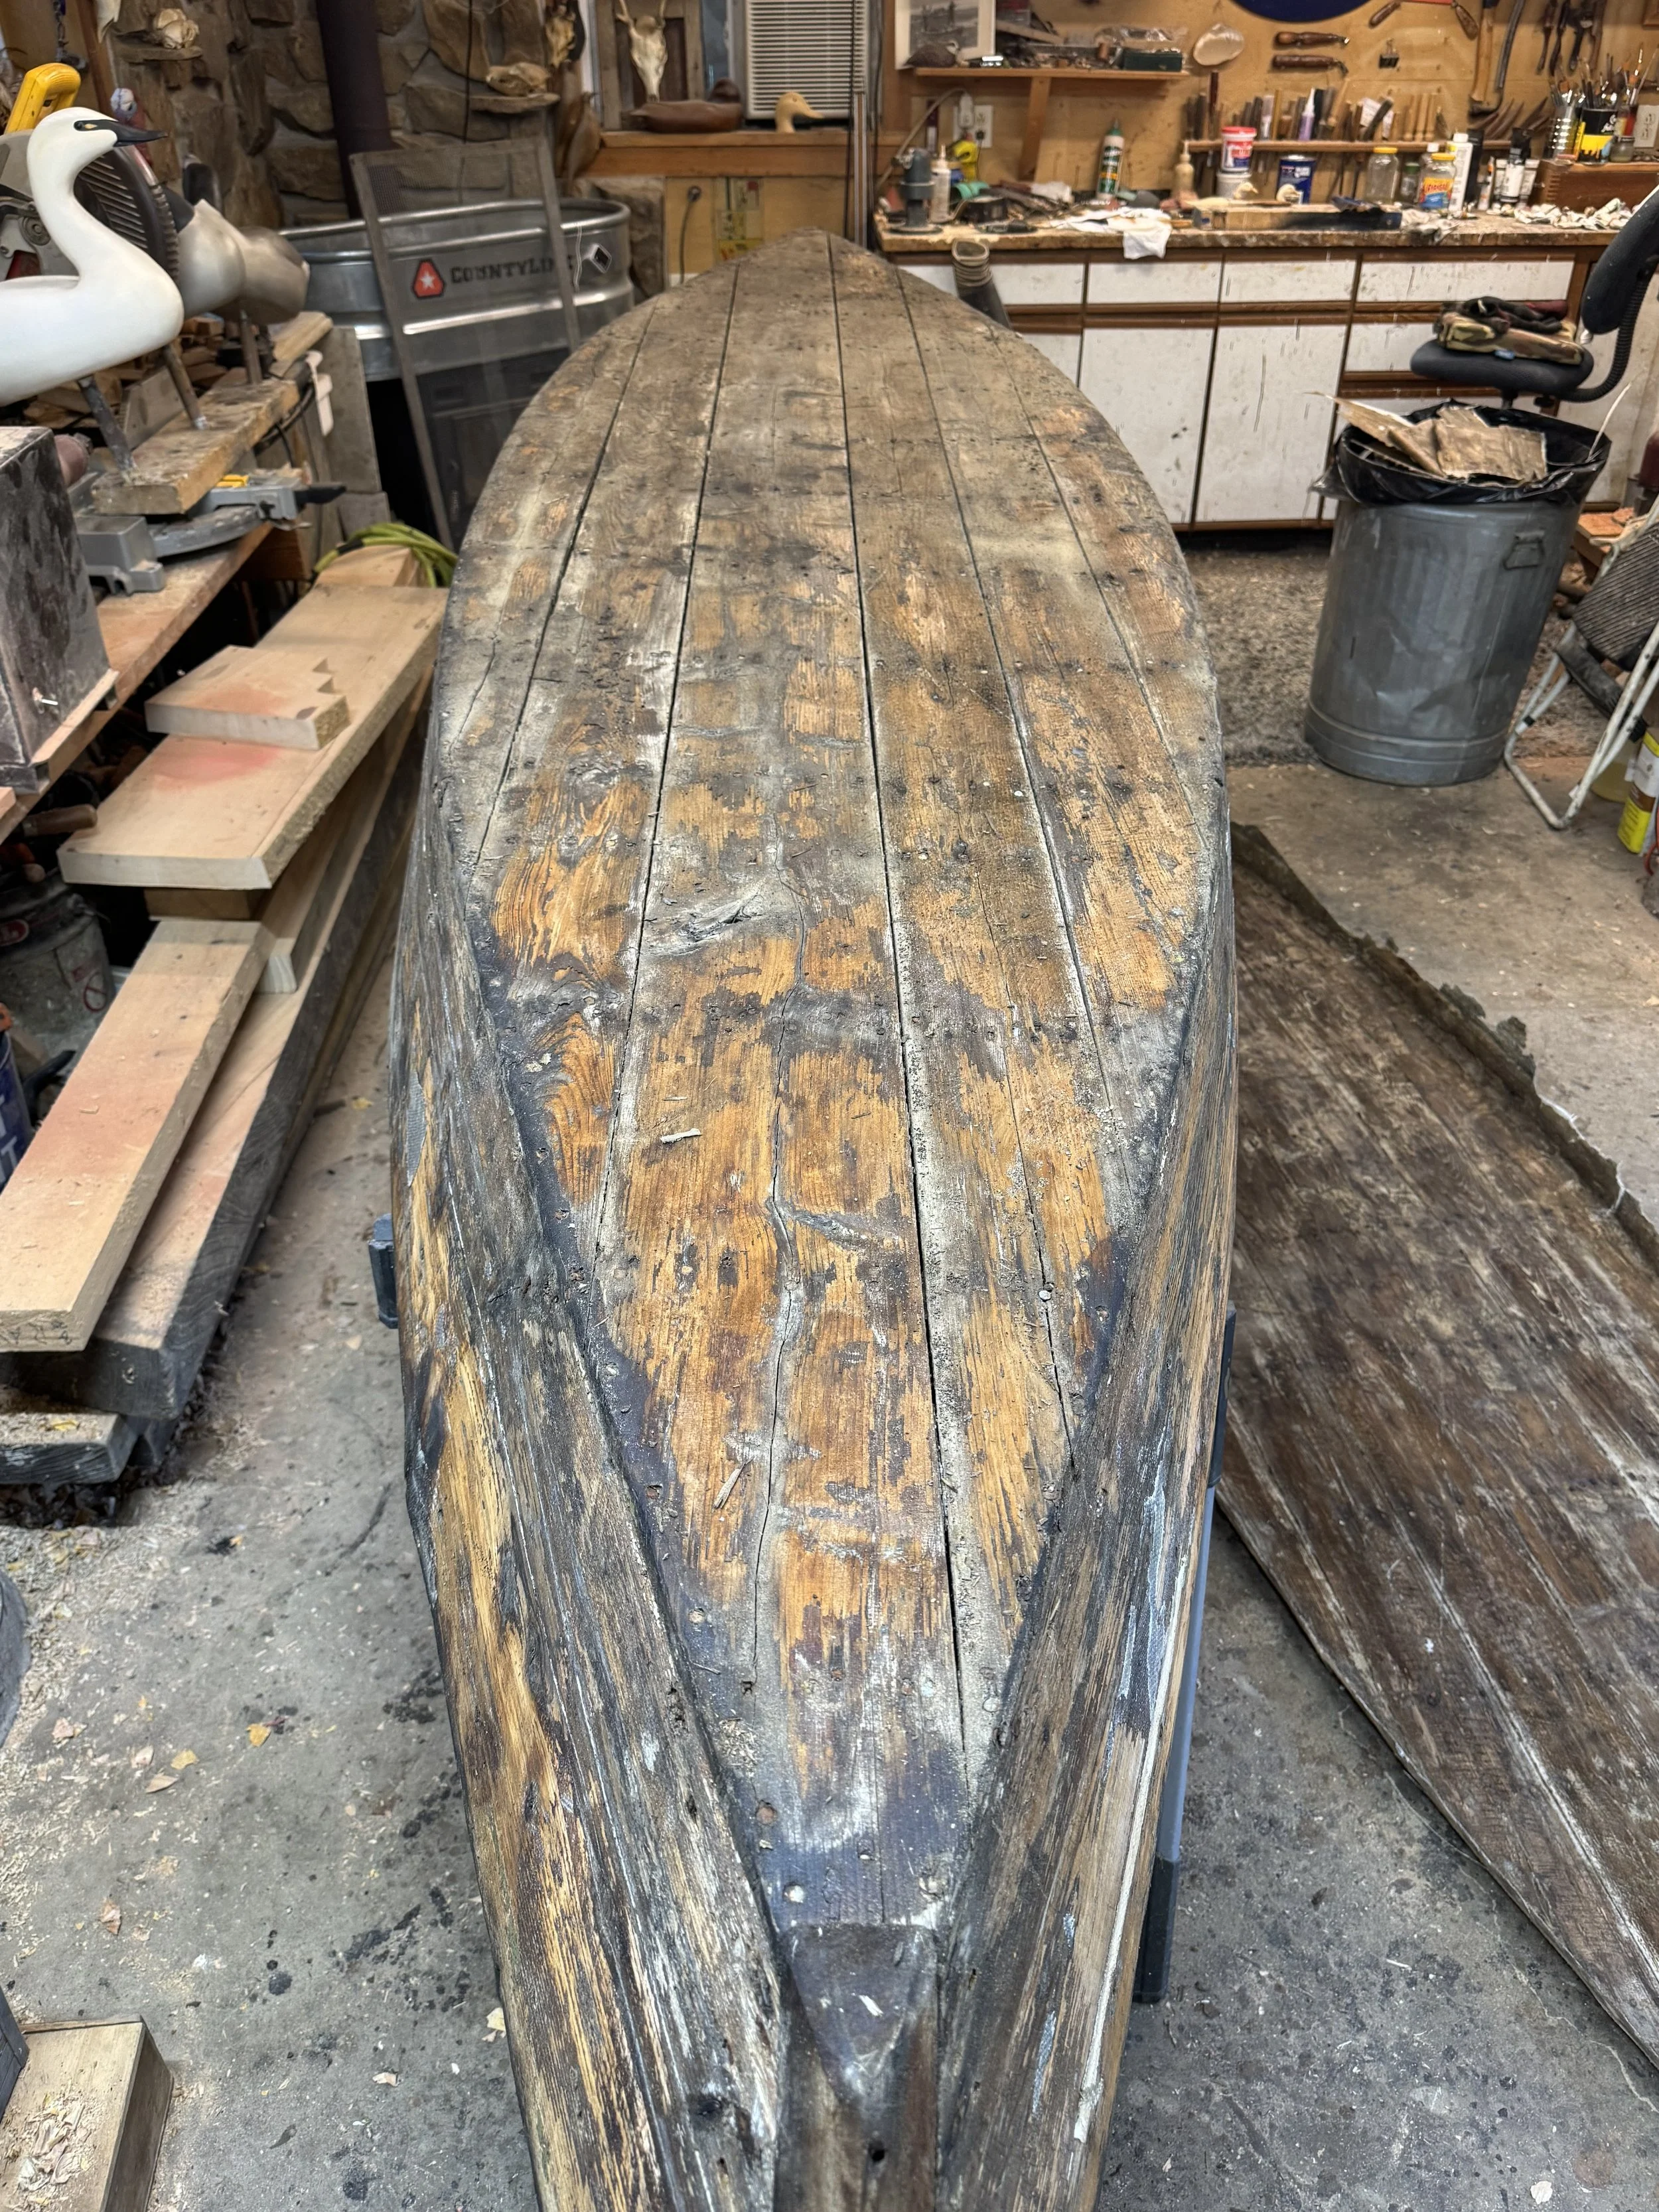
Two layers of old fiberglass removed, showing cedar planking. Old ‘glass visible on the floor right hand side.
This boat was complete cedar construction. The cedar planking was fastened to white oak Ribs and mahogany stems. It had the original layer of coarse woven 6 ounce fiberglass over the cedar planking. On top of that was a later layer of much thicker 10 ounce tight weaved fiberglass. Both layers were delaminating and needed to be removed.
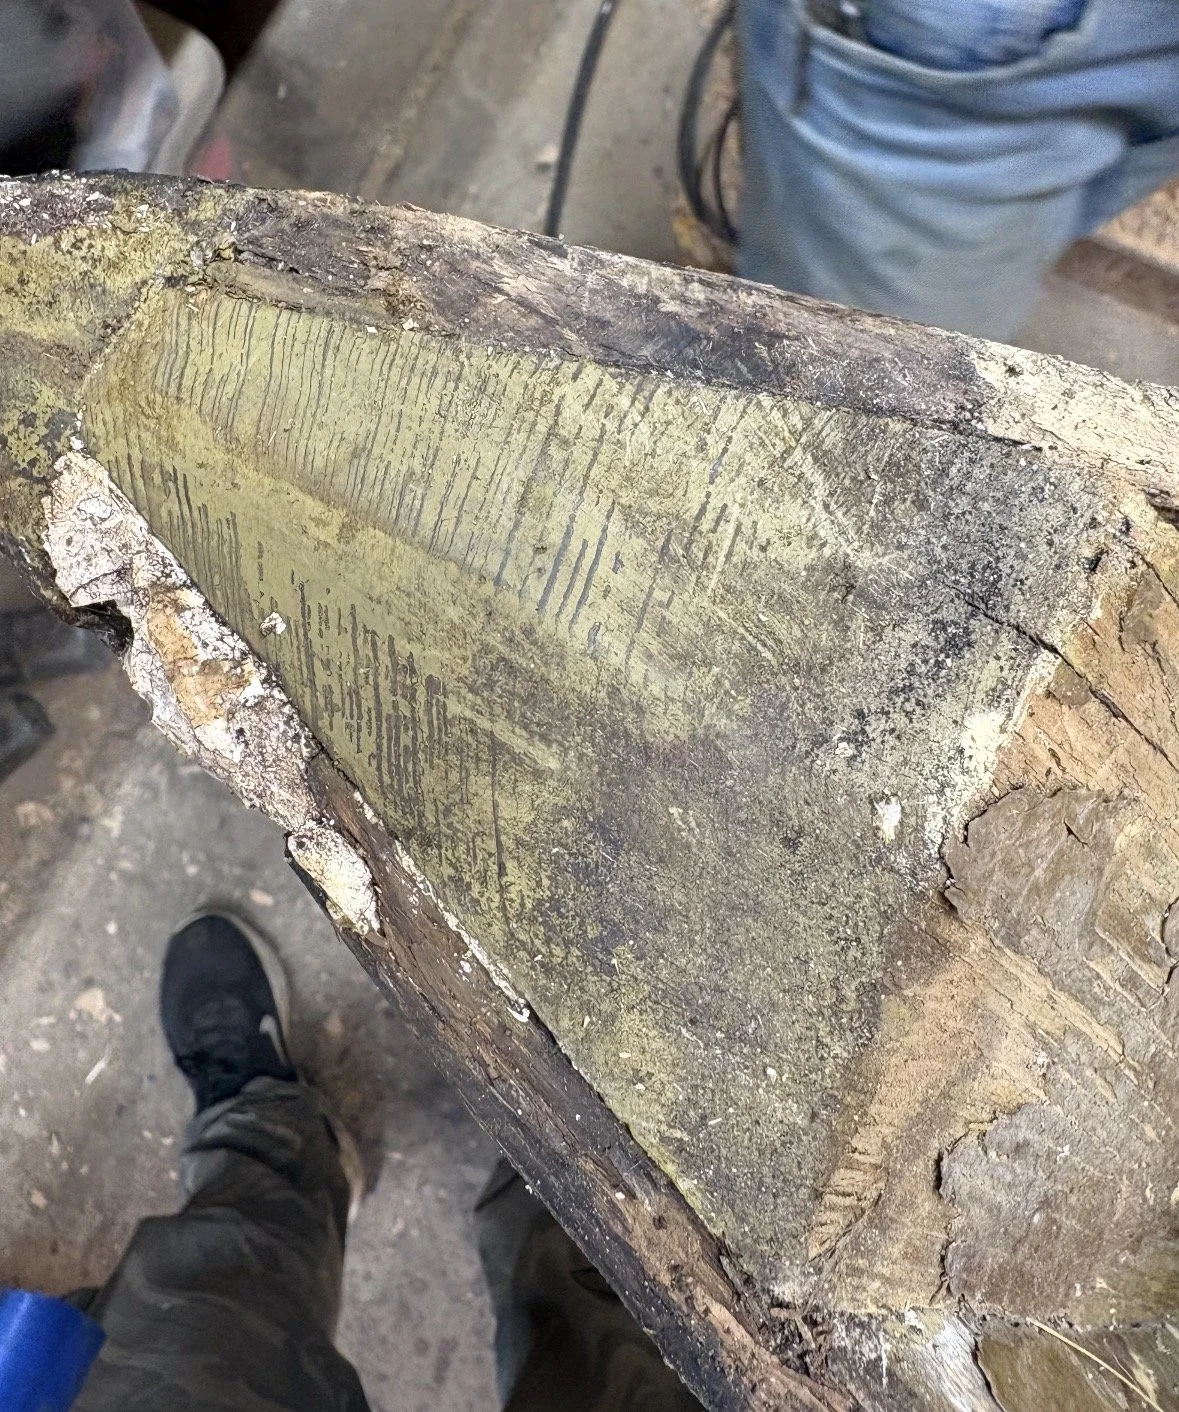
Rotten stem which needed replacing
There was also significant damage to the stem which is common with these boats. There are hand holds, unique to this builder, inset into the decks. It allows for easy handling. However they often allow water to accumulate against the stem if the boat is stored upright. Rot is generally a concern. Besides the stem that needed replacing, and new fiberglass the boat itself was in remarkable shape. The hull and side planking was well intact and in salvageable shape overall.
The front and rear decks however had been worked on more than once. Some of the original cedar replaced with rough sawn Douglas fir. 1/4" Thicker than the original and not nearly as beautiful nor well fit. I knew this needed to be replaced.
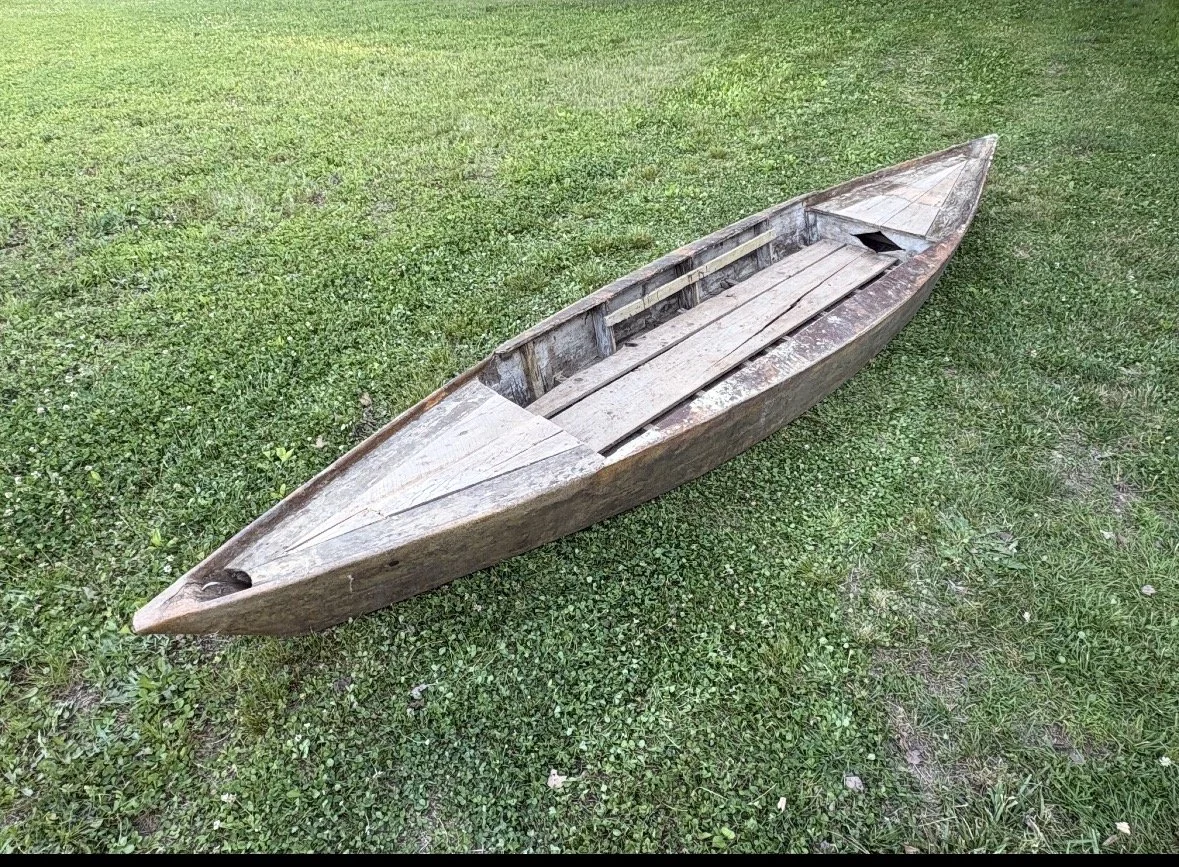
You can see the center deck boards had been replaced.
My intention was to restore her back to her original shape, done as a working rebuild. No high gloss varnish, but instead a combination of deep hunters green boat paint and clear satin varnish. The signature starburst decks I planned to redo with clear white cedar. The real work was just getting started!
Once the old fiberglass was removed, the next logical course of action was to assess the strength and condition of the bulkheads and framing. Both front and rear bulkhead had cracked badly ( due to the triangle foothold cut outs,) and needed replacing. Also, several of the deck frames and main frames of the boat were badly split from multiple fastening attempts.
To save weight, I chose to use white cedar for the bulkheads, and for strength white oak for the deck frames. Not all of the framing replacements are shown, however, I probably remade 40% of the skeleton of this boat. If your gonna do it, do it right!
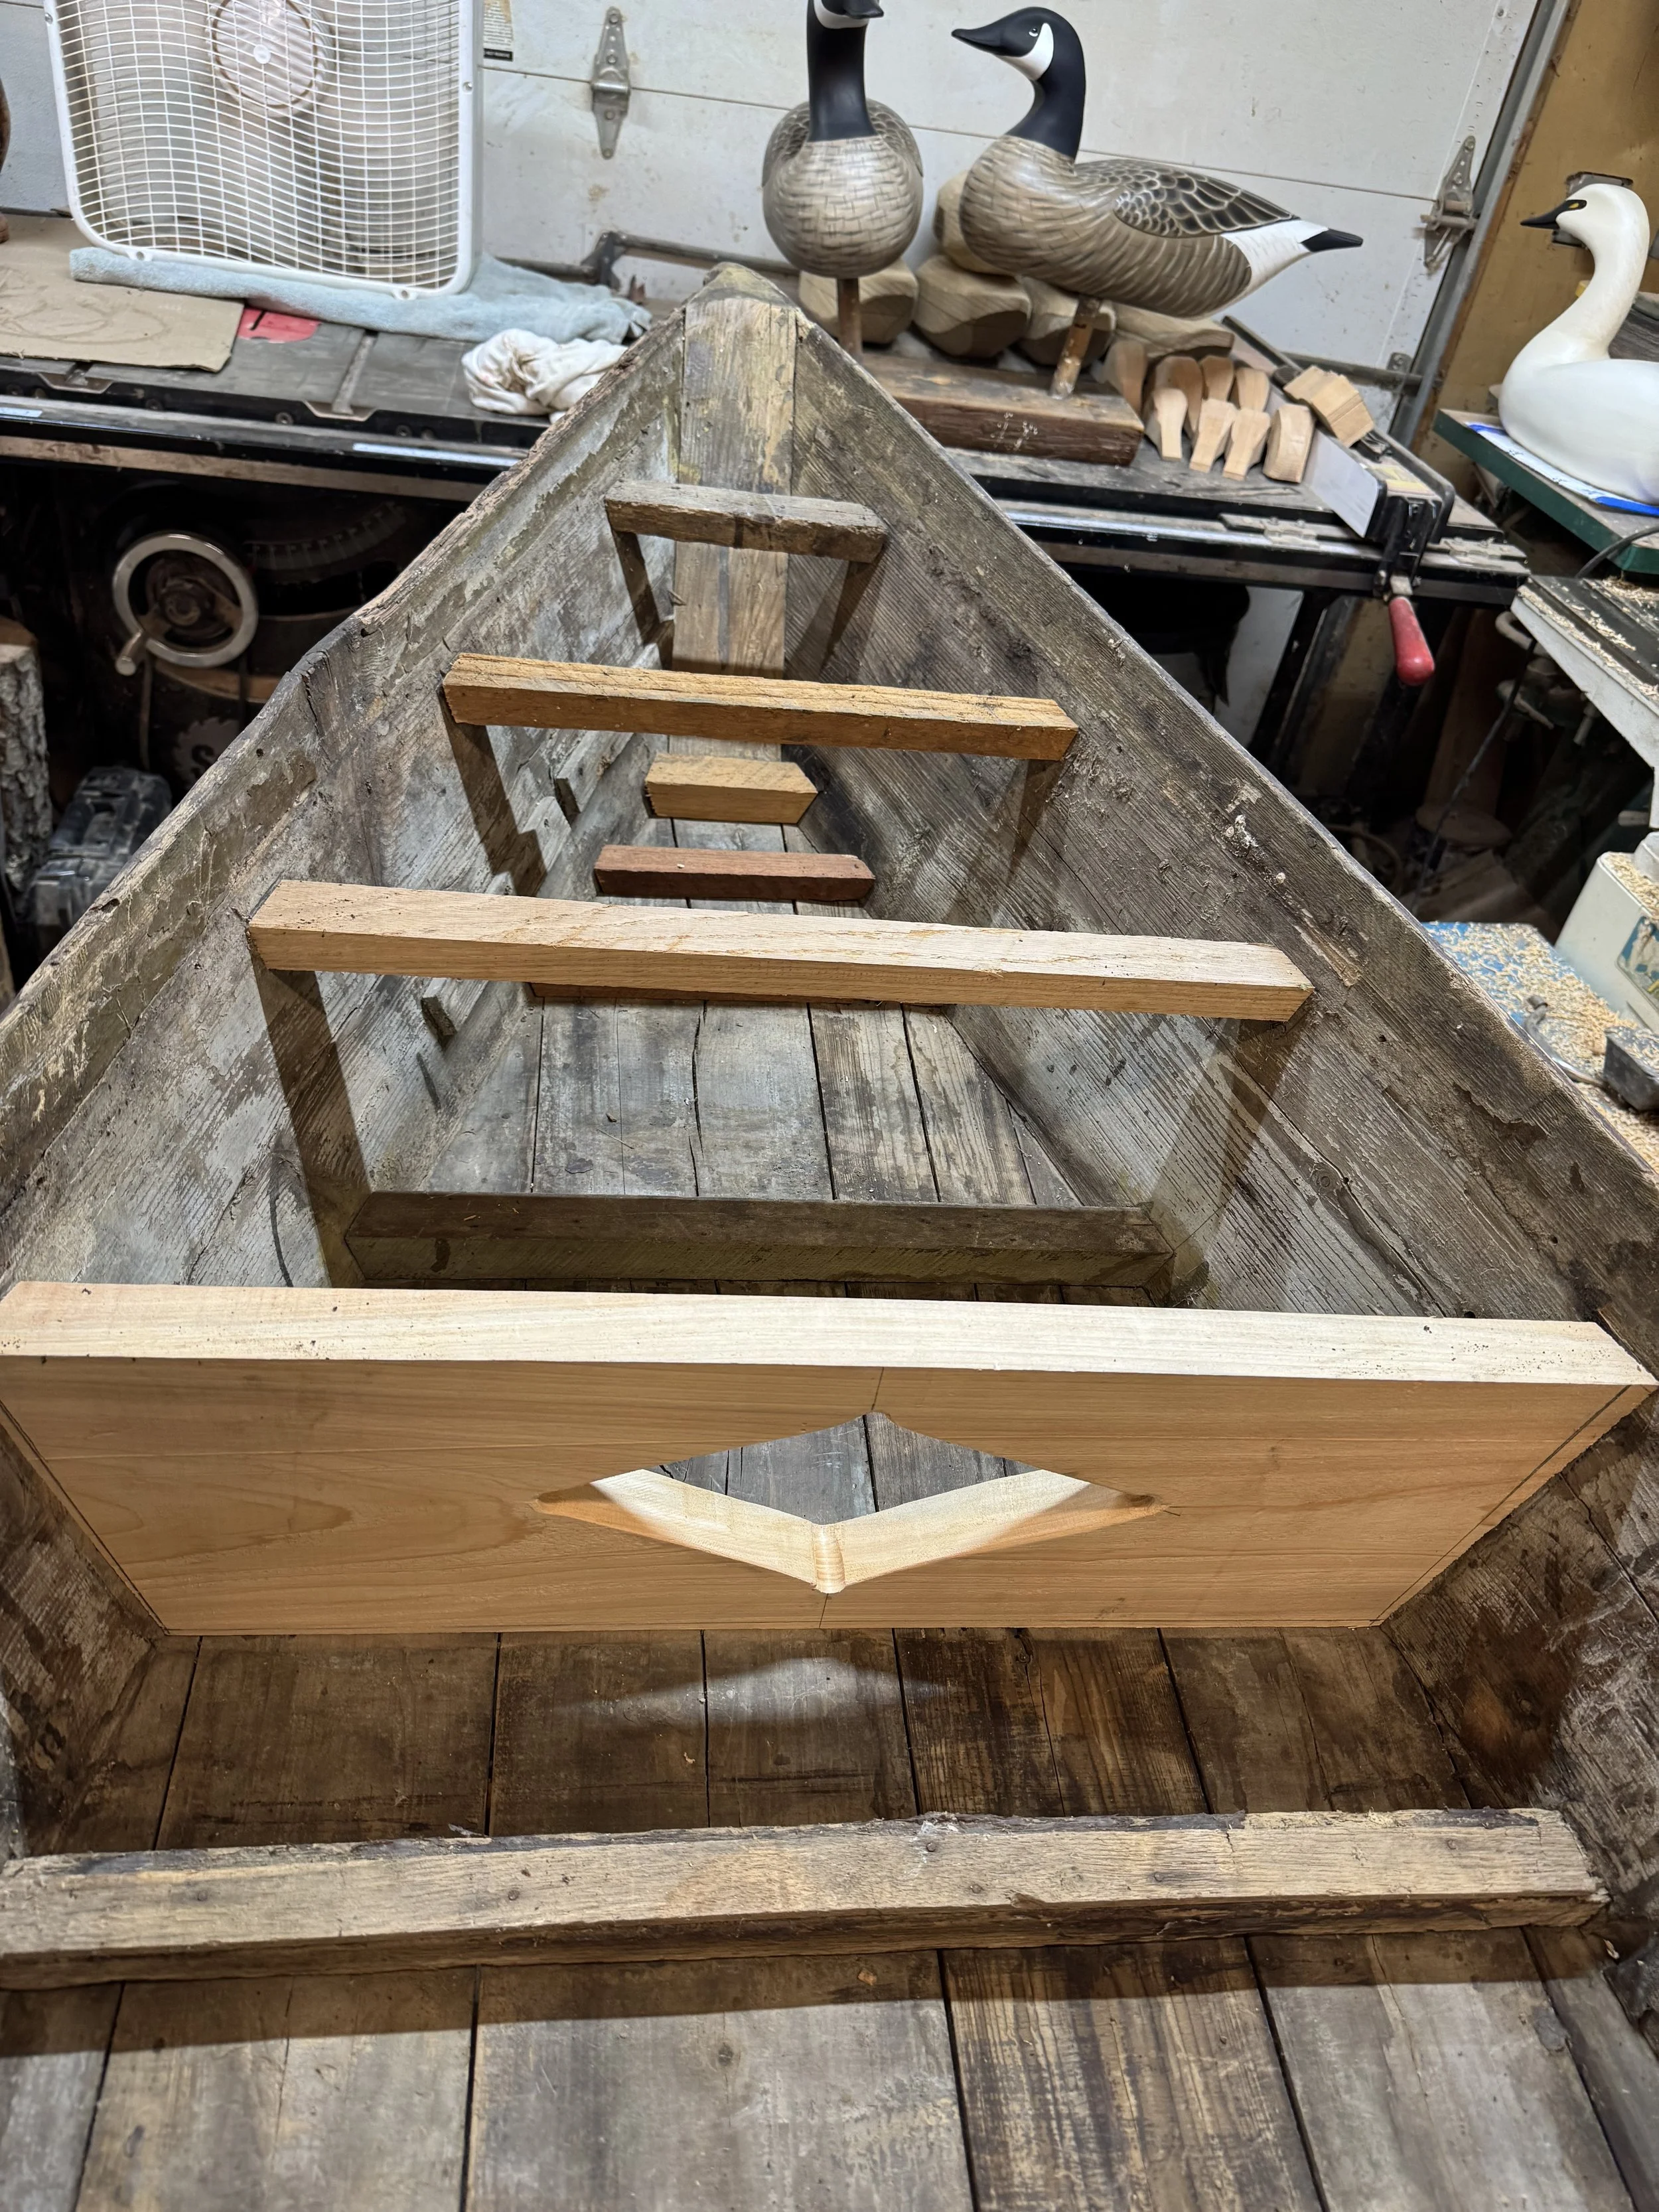
Deck frame and front bulkhead replacement.
After the labor intensive process of replacing the bulkheads, deck frames and side frames, the next logical course of action was to address the rotted front stem. I decided to make this out of a single piece of white oak. I then rabbeted a groove to accept the white cedar planking.
The top edge of much of the cedar planking had deteriorated due to the second layer of fiberglass being wrapped over it. They allowed water to accumulate and breakdown the wood fibers. In several areas along the top of the watercraft I needed to fit in new Cedar planking to bring the top edge back to true. You can see such an area in the stem replacement photo.
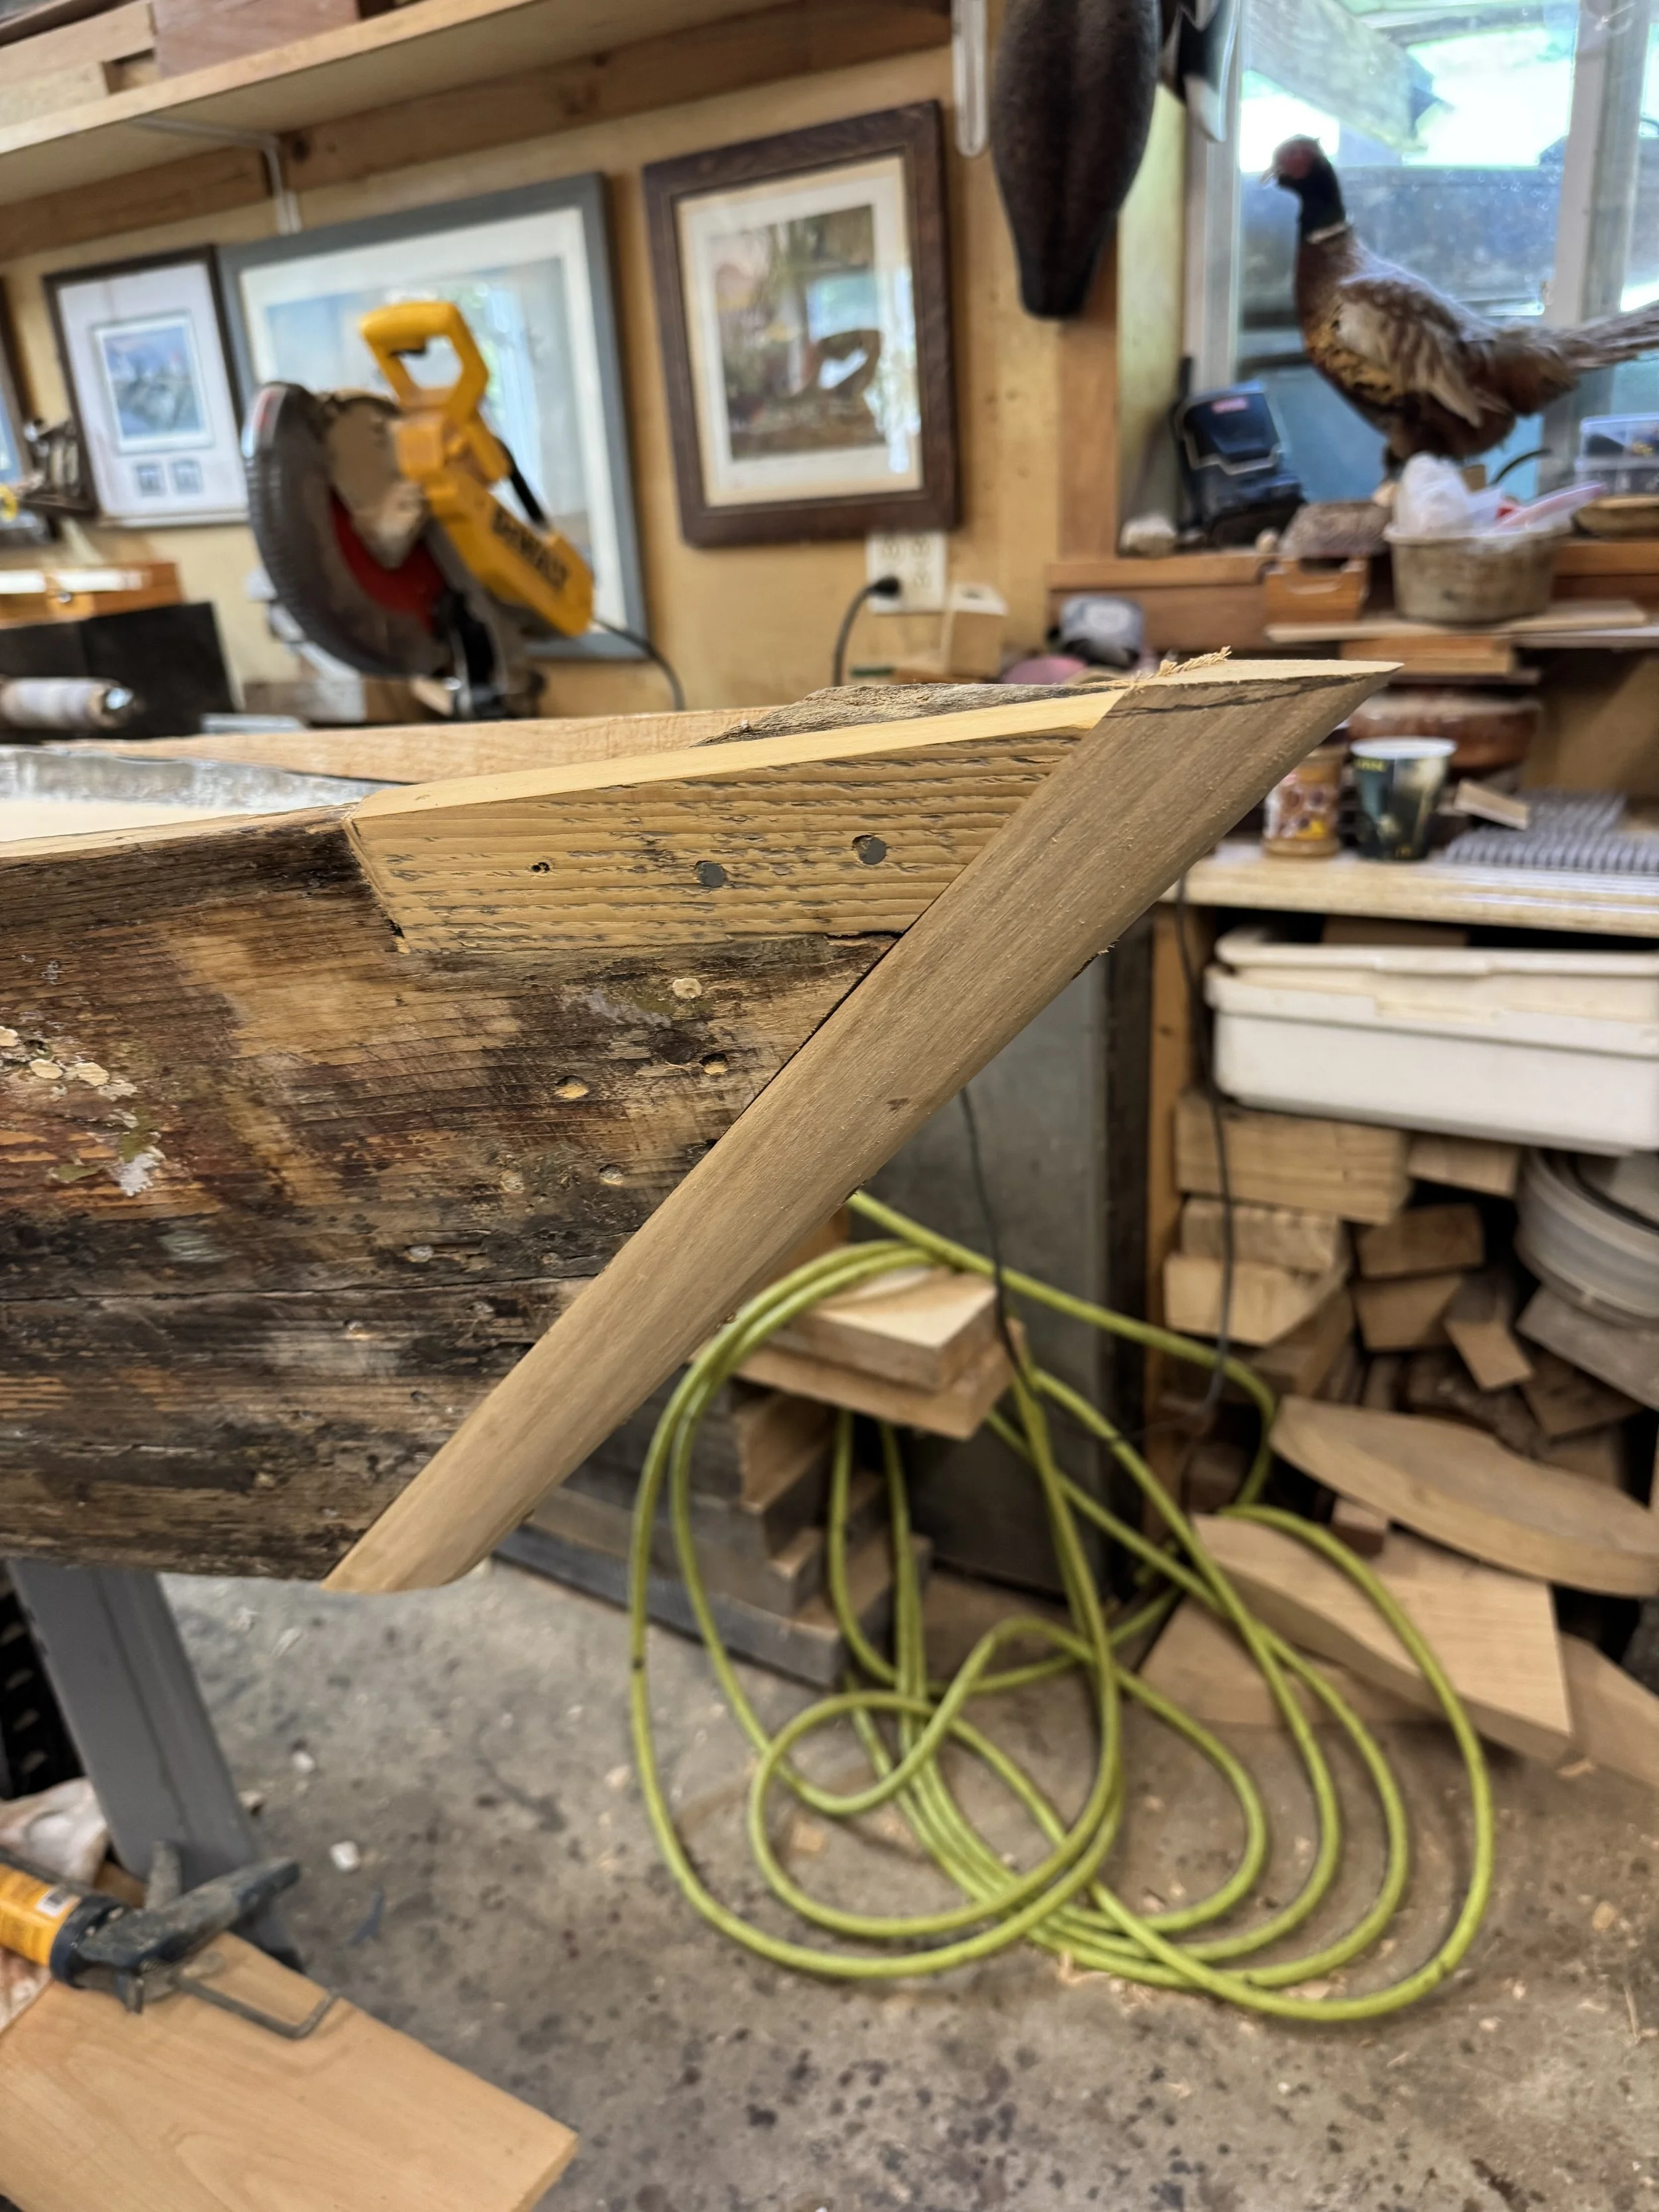
New front stem made from White oak.
Now for the fun part! As a boat restorer and builder, I find working on deck planking to be the most satisfying undertaking. Fitting these thin, clear pieces of wood into the signature starburst arrangement would be both painstaking and enjoyable. Mr. Beale was one of the only builders I am aware of to run his side planking full and then fit the center planking in a triangle fashion.
Most other builders started with the Center planking being full width and then trimmed the port and starboard pieces to fit. This signature attribute was something I intended to highlight, As it was my intention to leave the cedar decking clear finished for its beauty to be on full display.
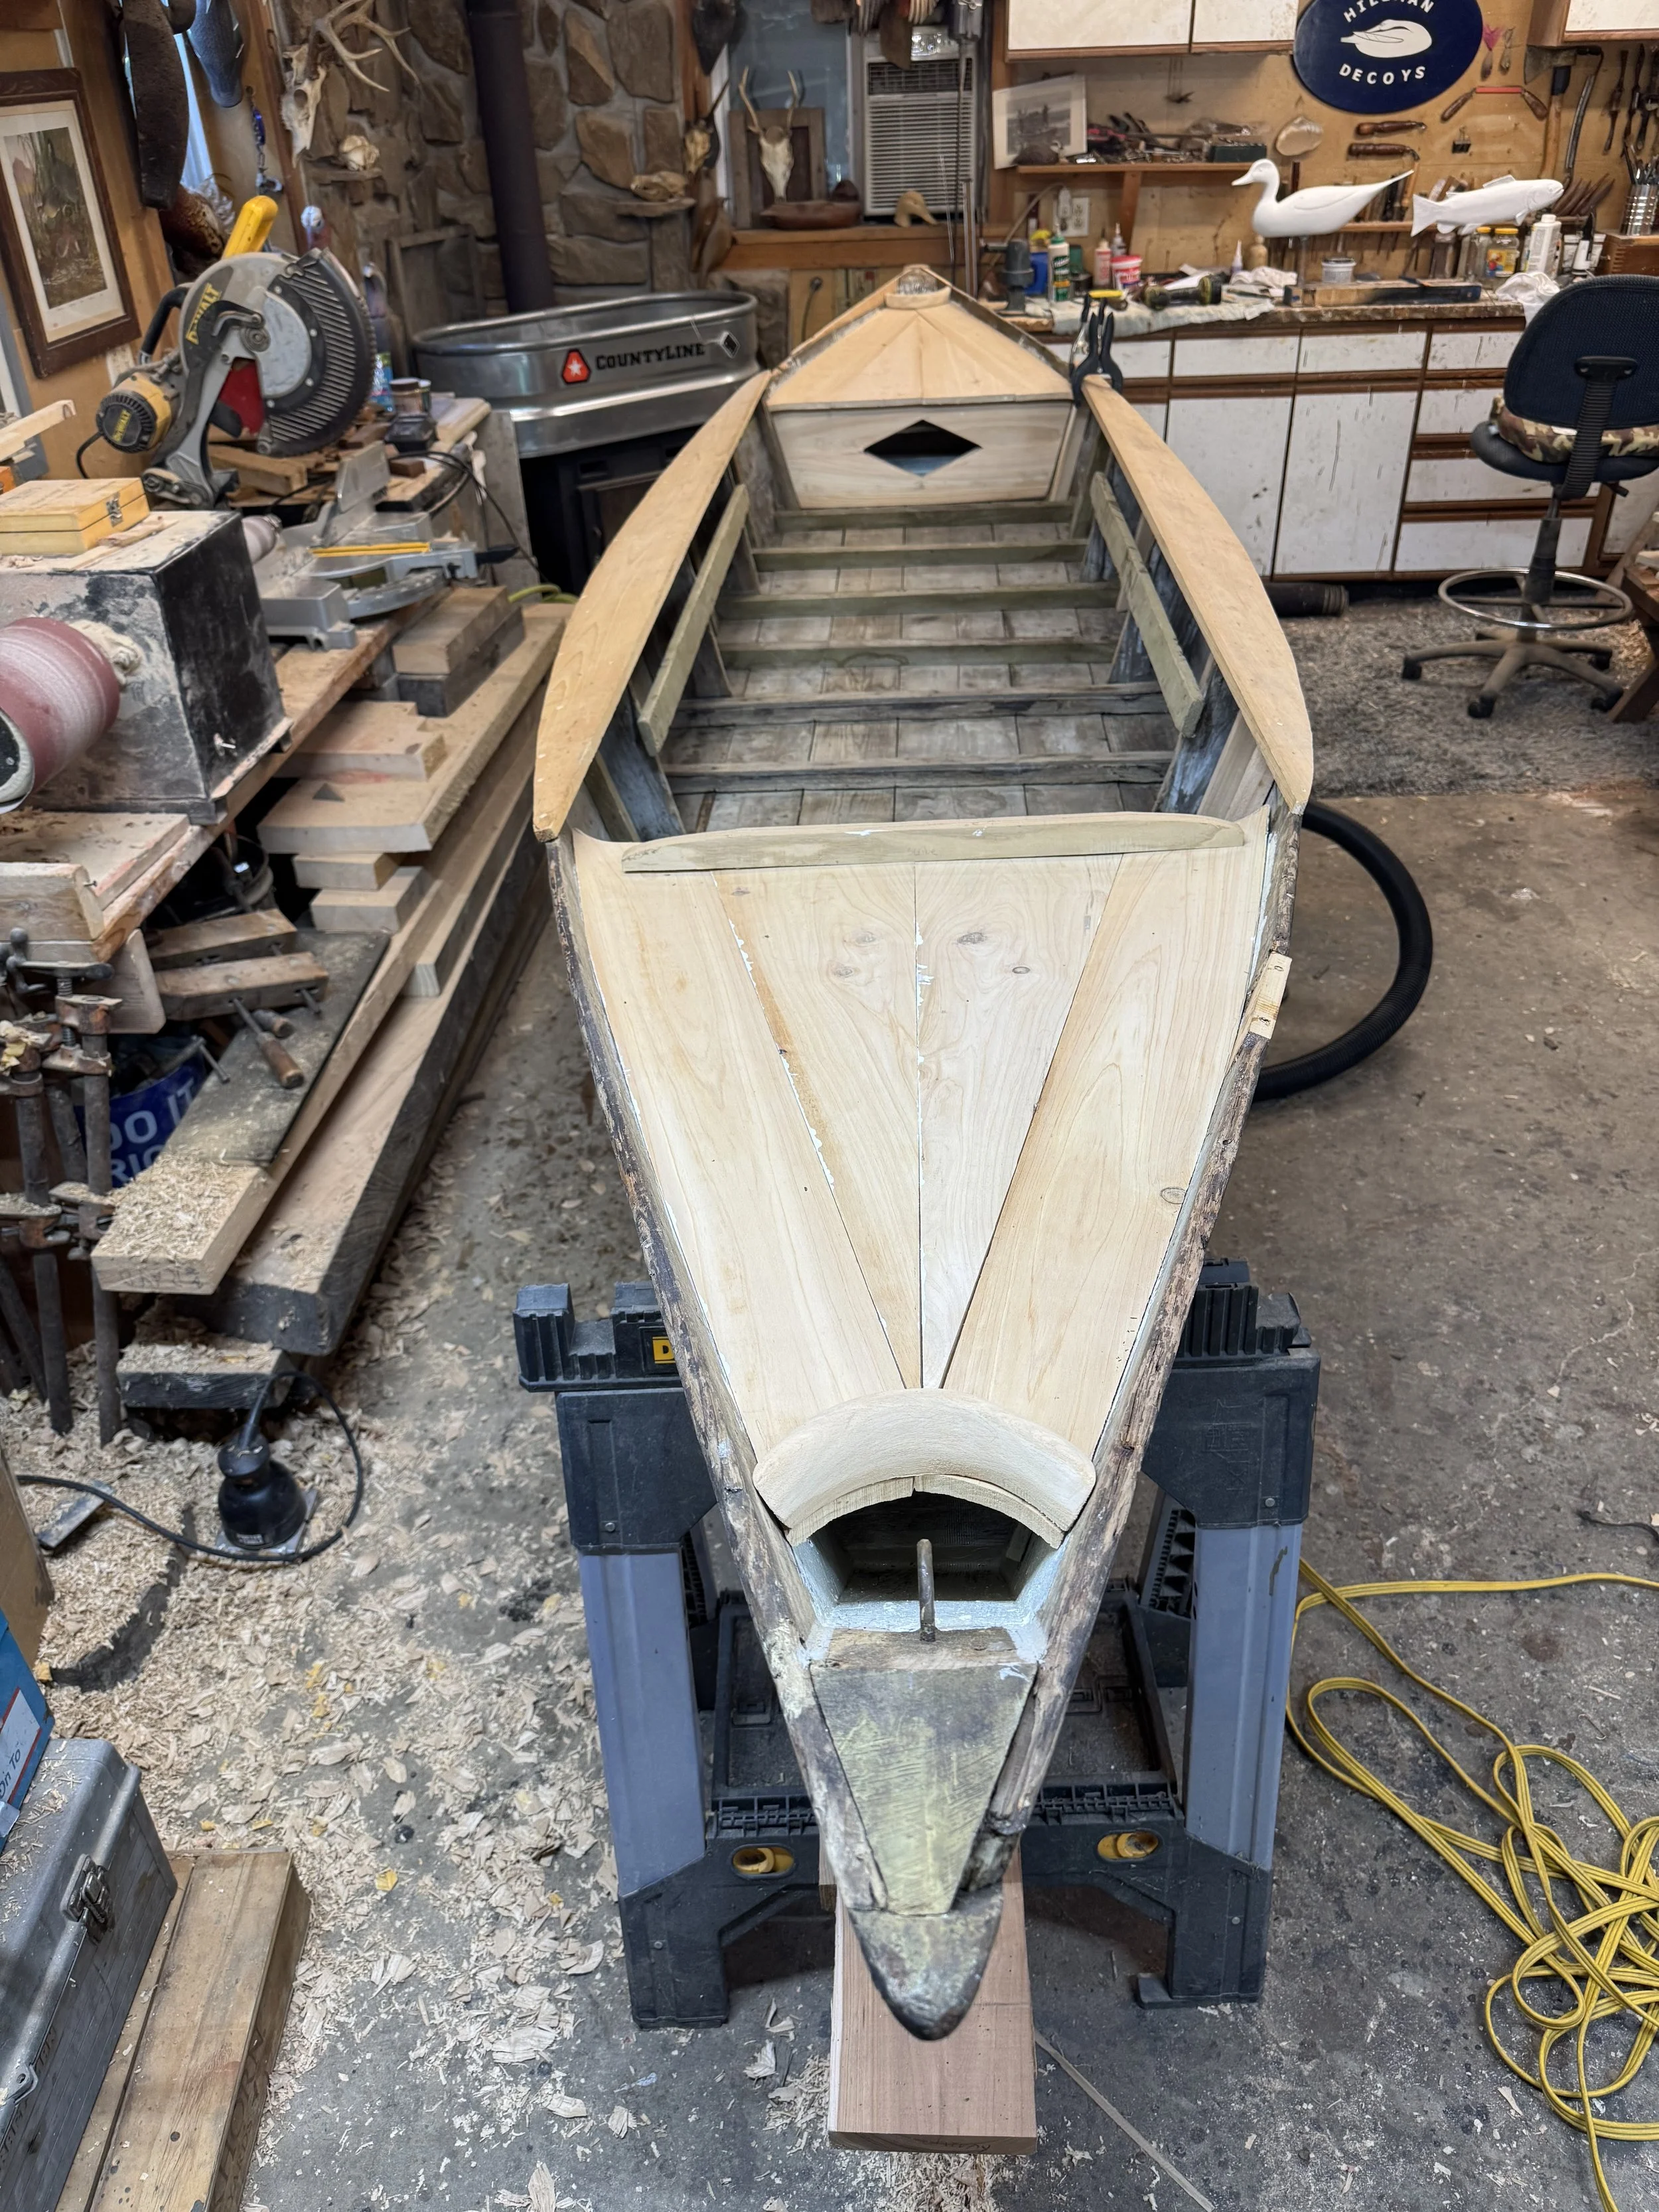
Cedar deck details, the center planks are over 8". Cleaned plank seams also visible ready for sealing.
After the decks were fit, I've then decided to take some time and clean out The plank seams. This is always an area of concern on old wooden boats. In days gone by they would have been filled with cotton caulking, and painted over with white lead paint.
Due to the scarcity and also toxic nature of some of these elements I chose to use different methods. I cleaned each gap carefully, and then used a marine sealing compound between the planks. This compound is waterproof, paintable and flexible and will allow some movement to the planks without losing its bond.
Because this boat was originally sheathed in fiberglass (and would be covered in a layer of fiberglass and epoxy again, ) it was imperative to seal the planks joints to keep water and debris out of this area
It is an inglourious and tedious job. But doing it right can mean the difference between another 100 years of use and the boat that fails in just a few seasons
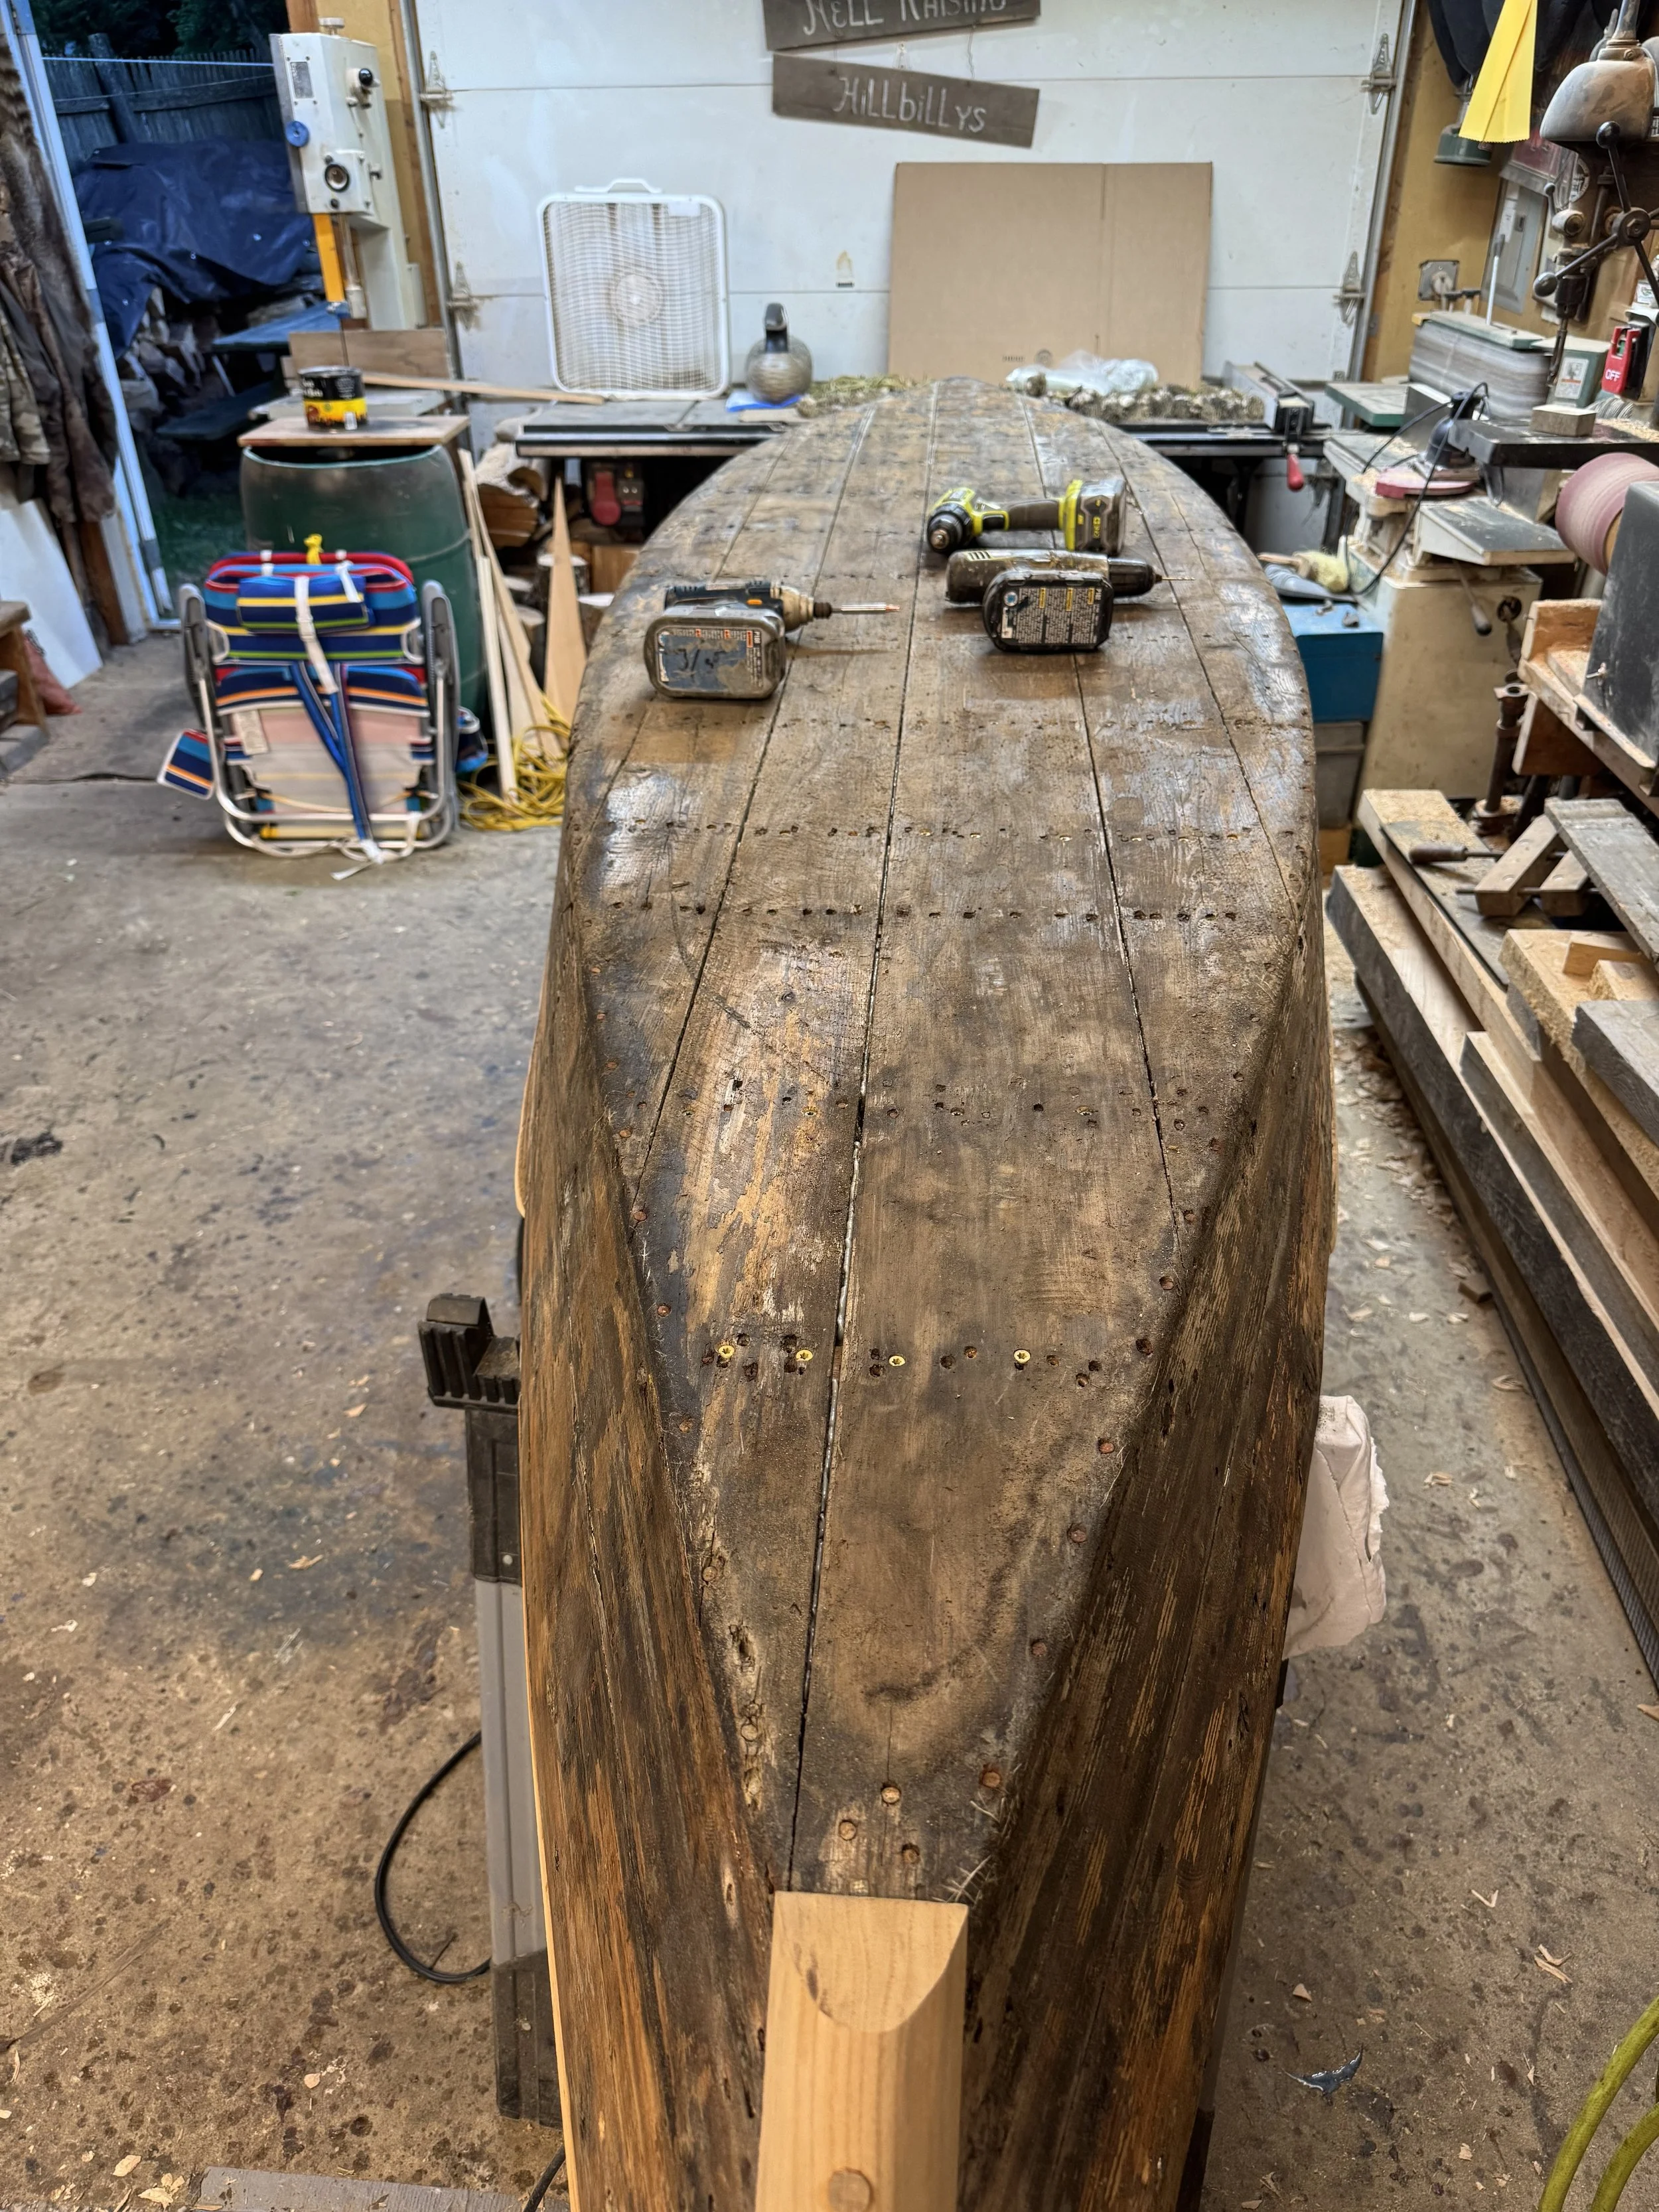
Rail skiff, bottoms up. Old fasteners removed, new ones being placed.
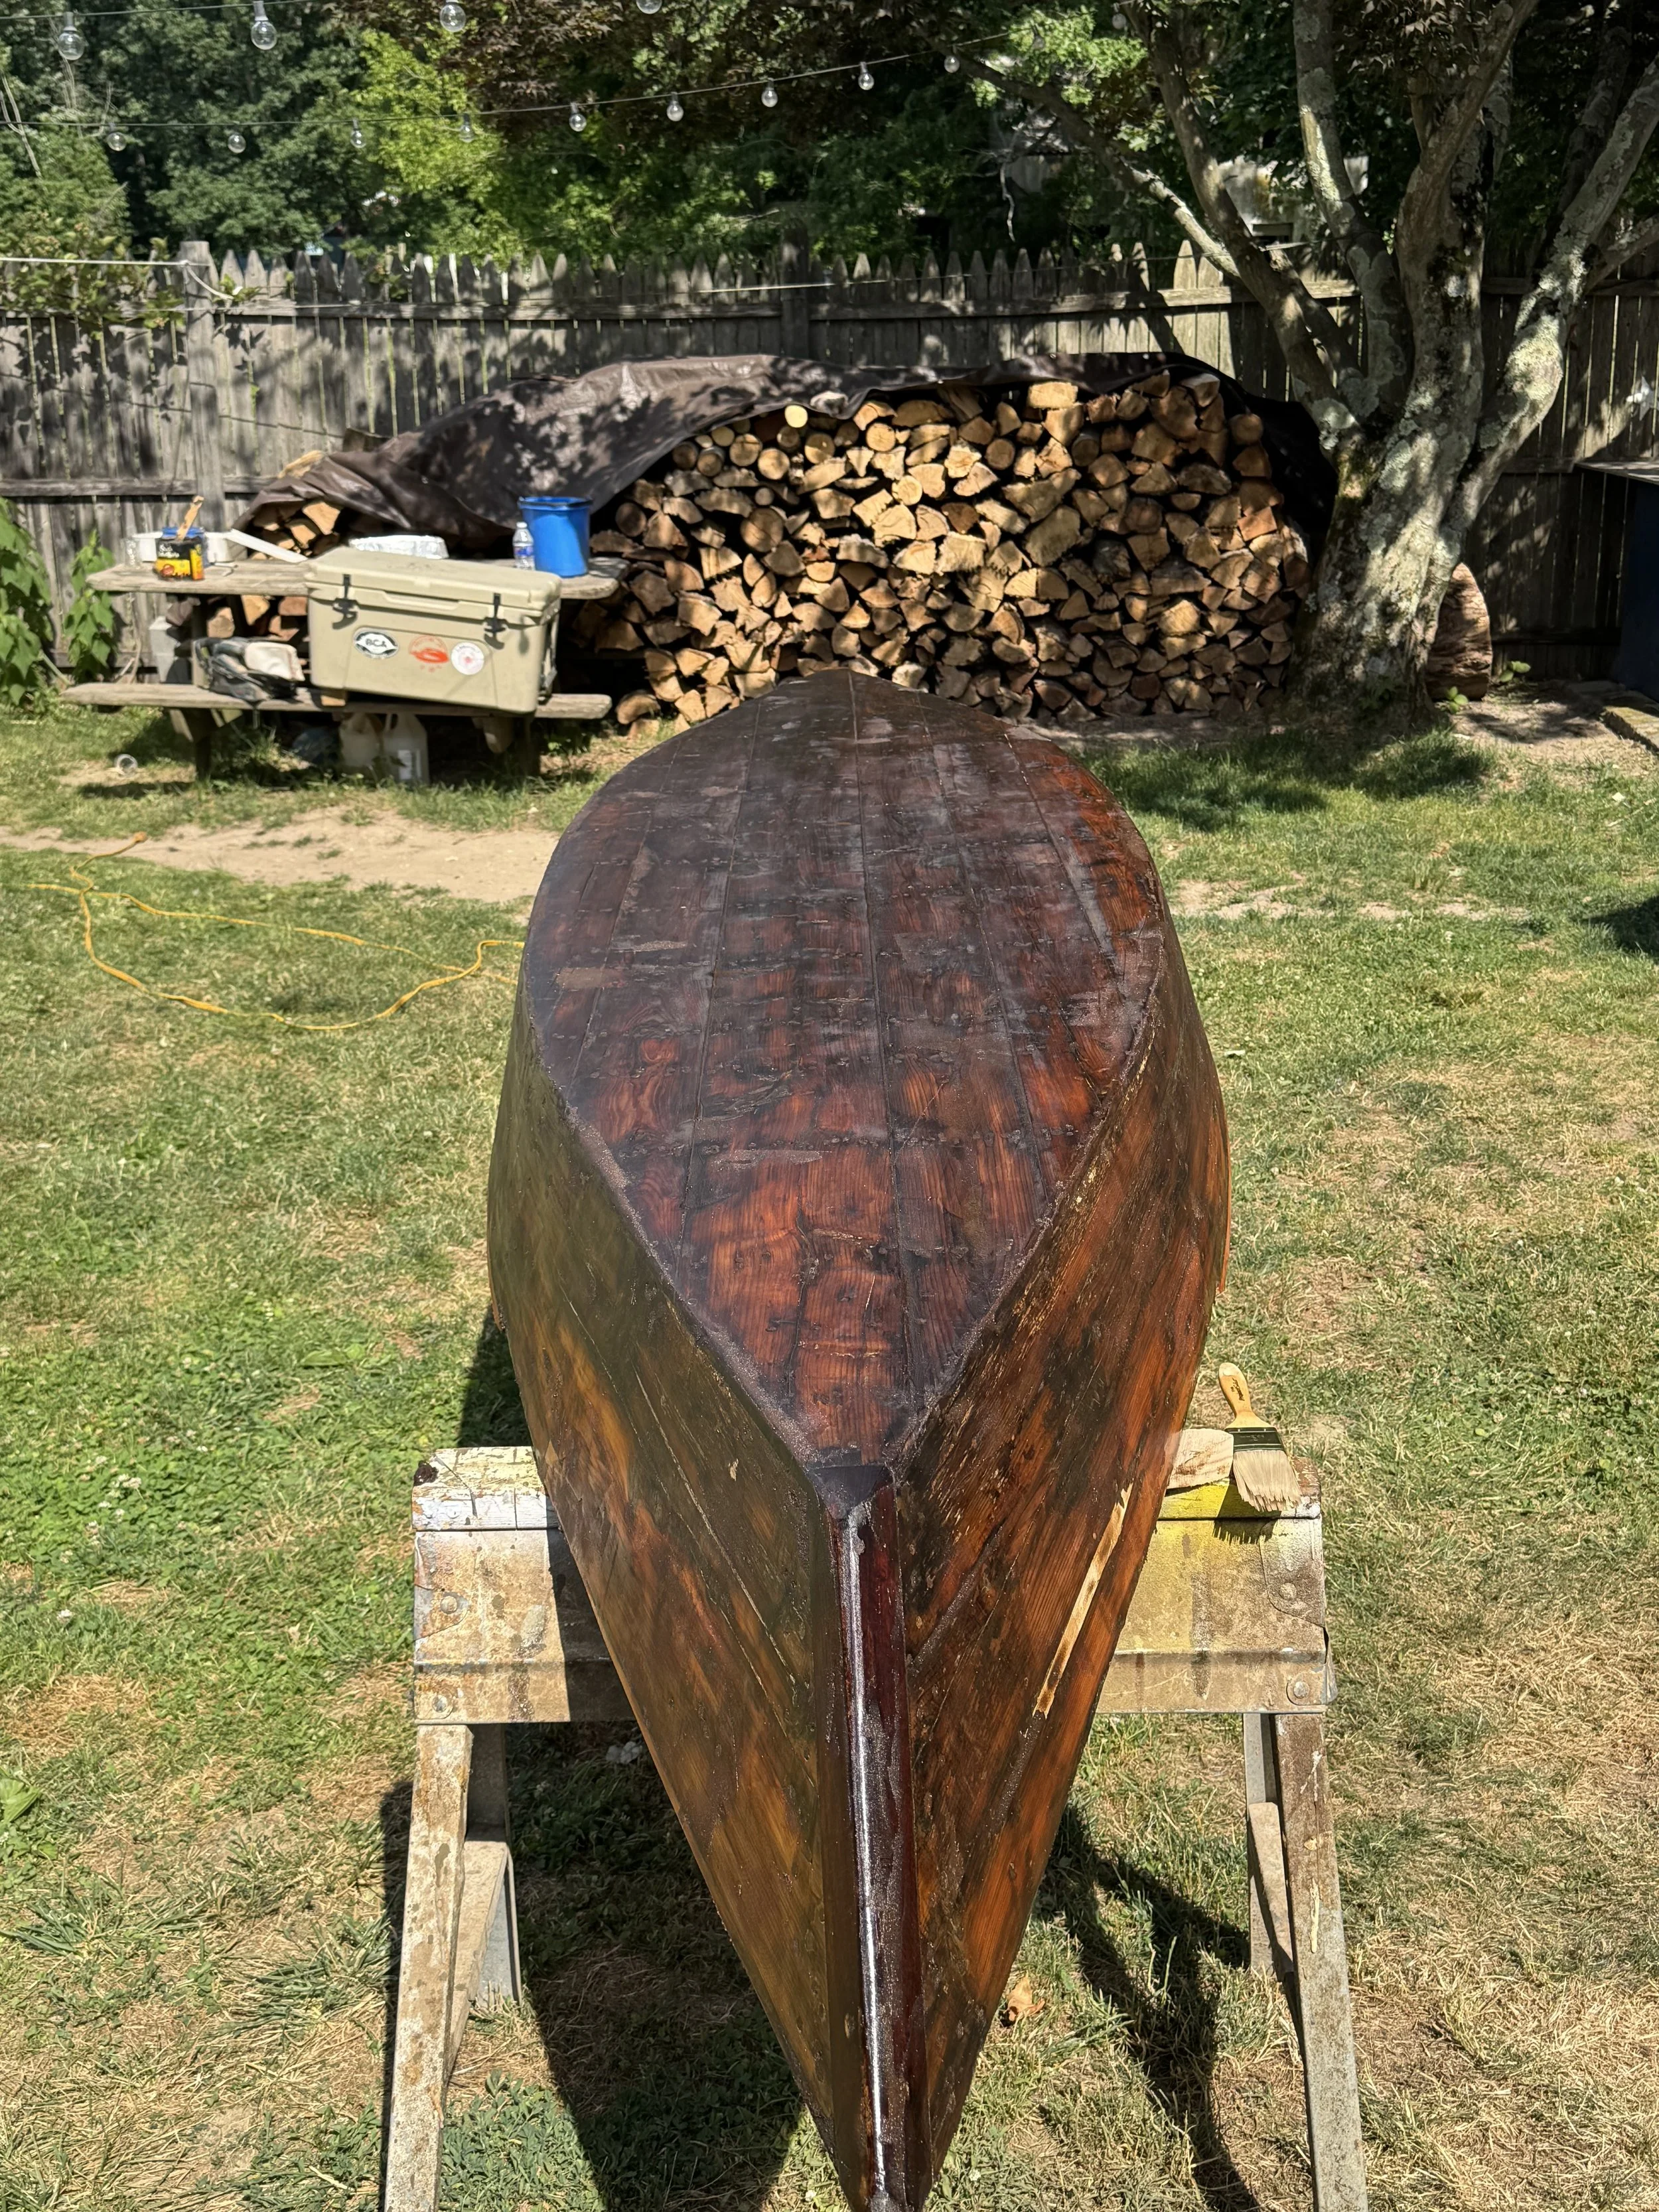
First step in the sanding and fairing process. A job best done outdoors.
Once the interior was well in hand, the job of flipping over the boat became the next priority. This craft is fairly light for her size and construction. Likely tipping the scales at just over 125 pounds. It was not too hard of a job to put her bottom side up.
It was quickly evident that these planks have been fastened many many times. Old cut nails, Bronze boat, nails, plus modern day straight slot and Phillips head screws all adorned her in different places. I removed as much of the ineffective fascinating as possible and re-fastened her with bronze boat screws and where needed larger exterior decking screws.
After all of the planking was securely fastened, the dirtiest job of the build would ensue. Filling all of the many fastening holes and planking gaps. This was done with a mixture of epoxy thickened with wood flour. There's not much to say other than it is very akin to automotive bodywork. Sanding and faring. Sanding and faring again. Lots of dust, noise and an aching back! However, it is imperative that this step be done carefully and properly because this gives you the base for your fiberglass and final cosmetic finish of the skiff.here is no way to rush the fairing process. I probably spent over a week bringing up low spots and taking down high spots. Keeping this skiff in proper shape while laying the groundwork for the Fiberglass cloth that was the next step
Once I was fully satisfied that the hull was as good as she could get. It was quickly progressing to glassing day!
It is my personal belief that epoxy should be laid up over a wooden boat in the evening as the temperature is cool. In theory as the wood cools off, I believe the fibers create inward, vacuum pressure and pull the epoxy deeper into its cell membranes.
It is a technique I was first exposed to by a boat builder from South Carolina. I did my own research and experiments, and his assertions in this area seemto be hold true. Perhaps it is just wishful thinking, but I have yet for this process to it do me wrong. At the very least you get to work in the cooler eying hours and this makes the job much more enjoyable.
Laying up fiberglass cloth set in epoxy is best done with help. For this task, I employ whatever skillful friends or family are around. This time it was my son Ethan and daughter Allison. Both have been put to work on a various boat projects in the past and so both know the steps needed to help Dad create a beautiful finish. Squeegees, paint brushes and serrated steel rollers are placed by the ready. A clean work environment as dust free as possible makes things go much smoother. For this layup, I decided to use a layer of 4 inch 6 ounce fiberglass tape over the chine seams. then cover the entire bottom of the skiff with another layer of 6 ounce fiberglass. I chose to use the tape and the full layup because in prior builds,( especially those that seen heavy use with the rice) , I have worn through a single layer of epoxy and fiberglass sheathing in about half a dozen years.
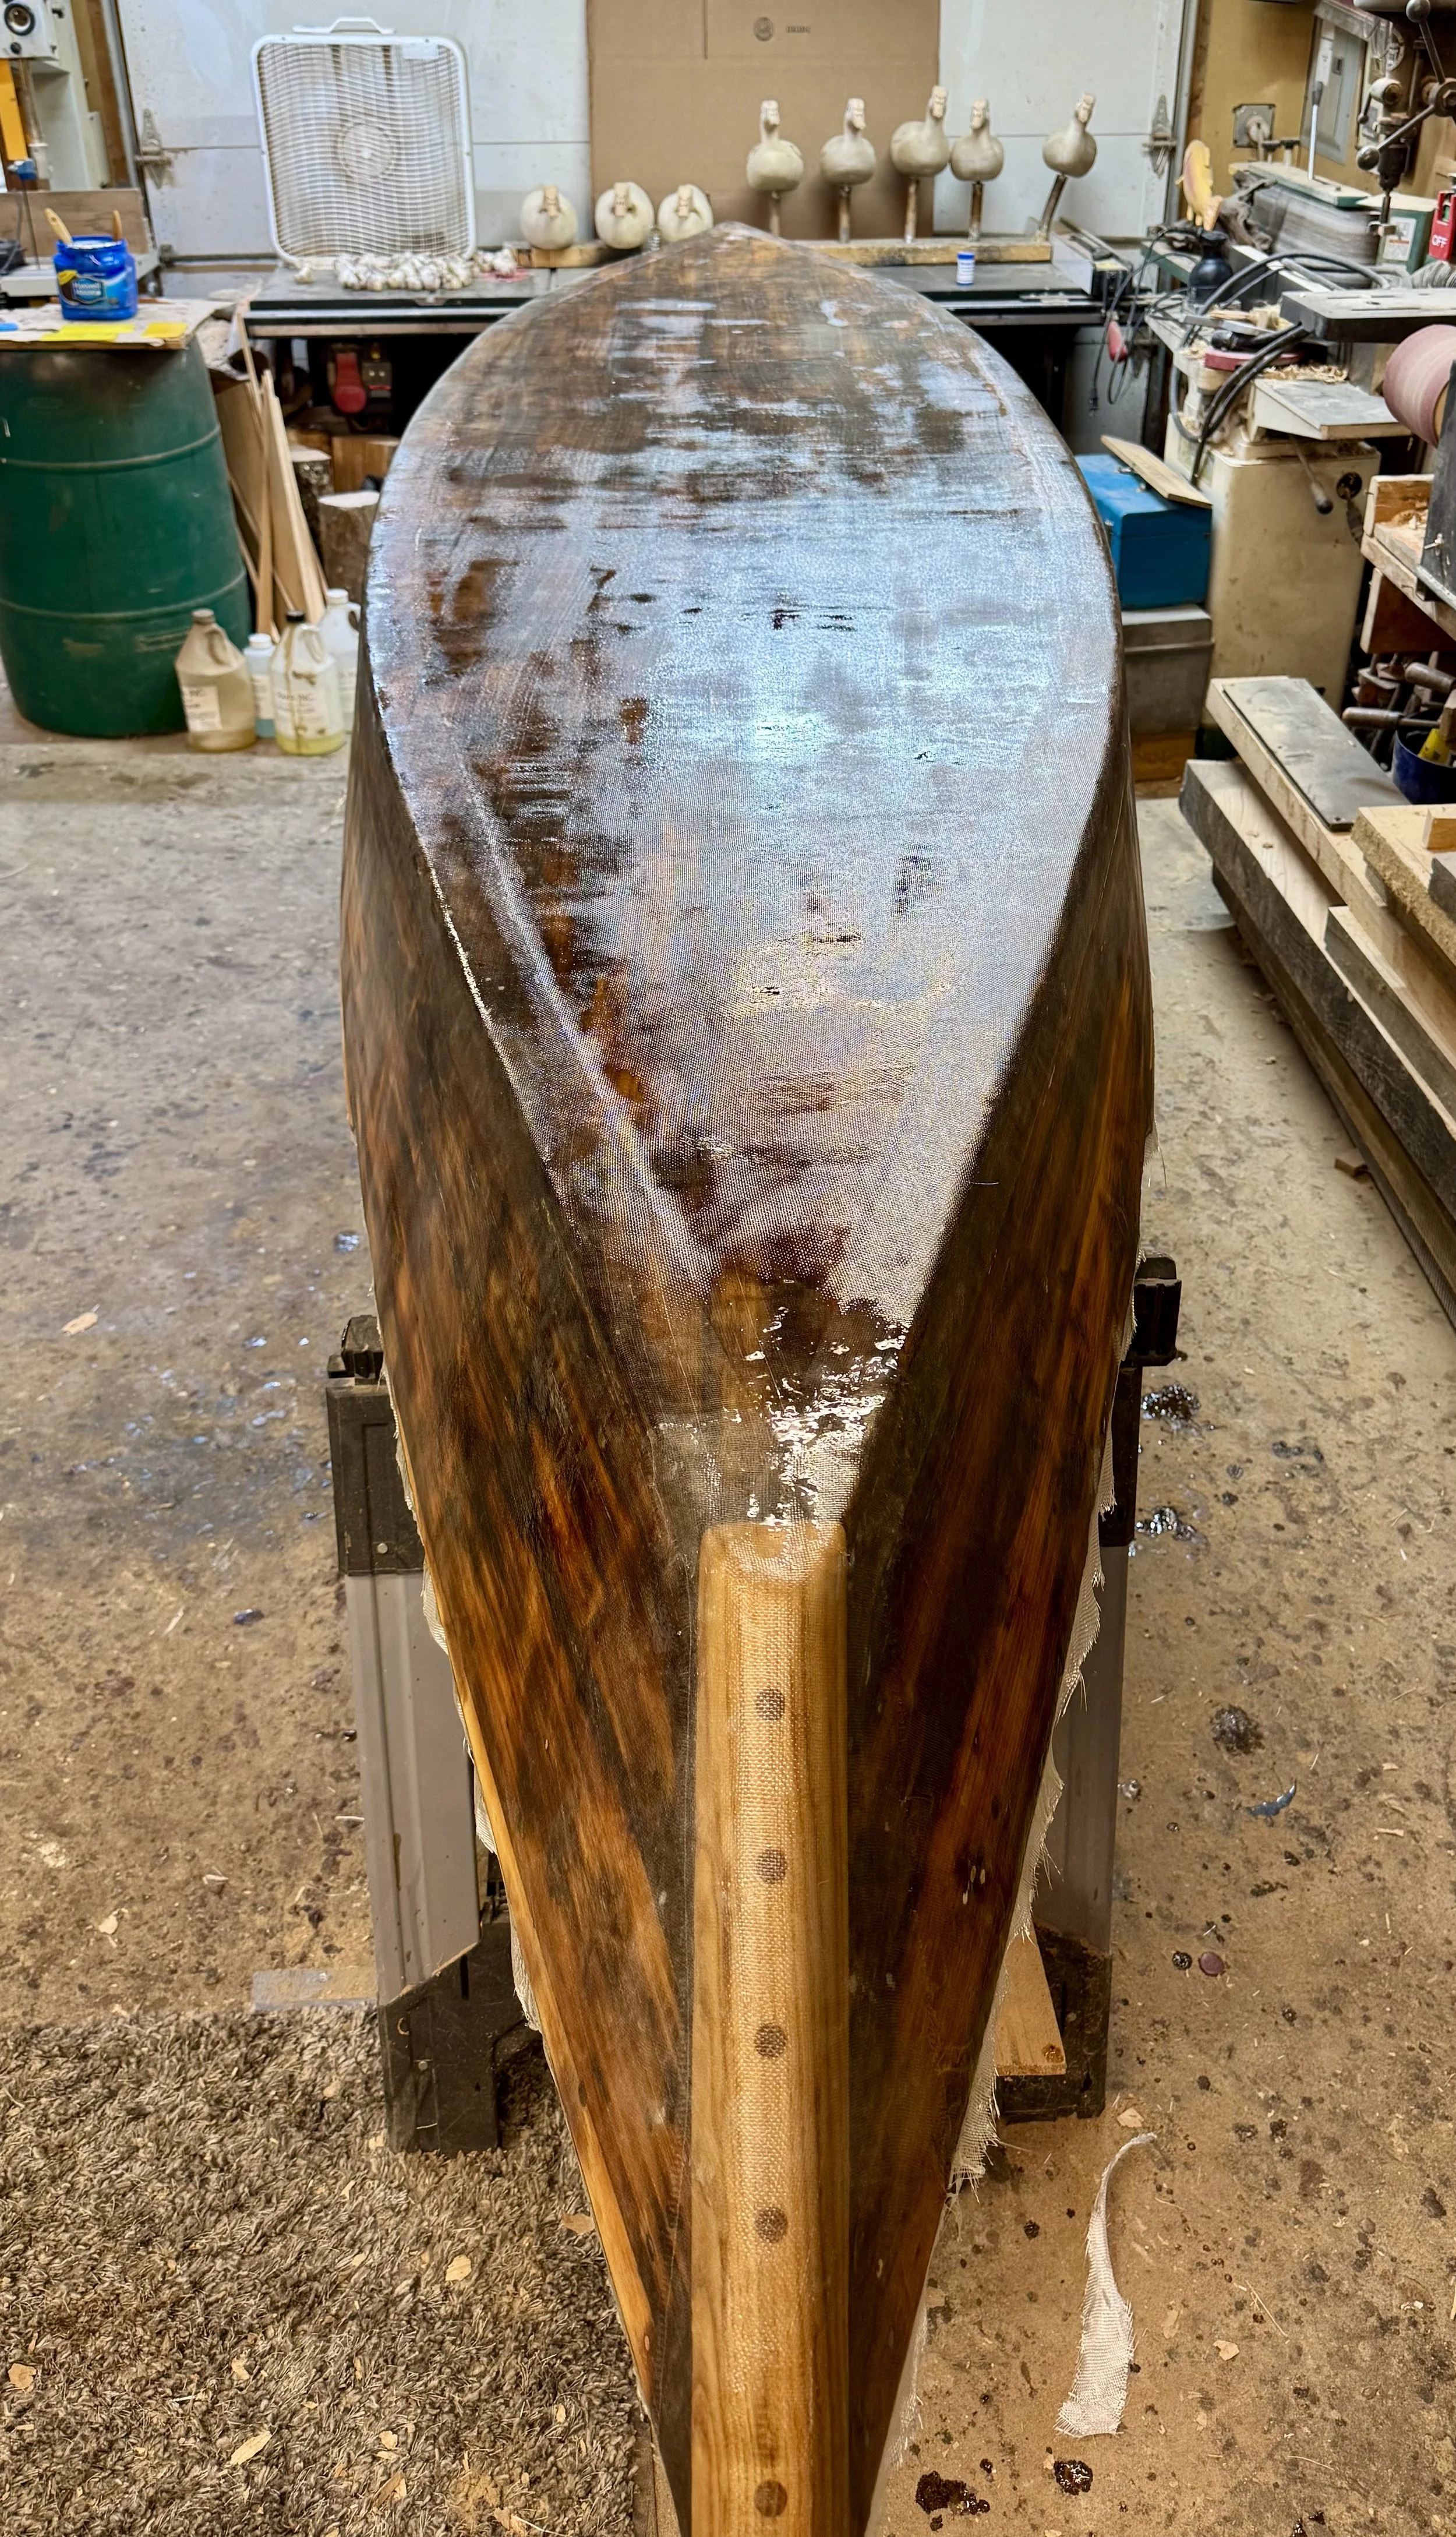
Fiberglass cloth and first coat of epoxy
Completing the glass job is a major milestone. With it, the project turns the corner from remediation to renewal. From here on out the rest of the steps are to create the final finished working vessel, bringing out the craft true Beauty. After another coat of epoxy was applied, the boat was wiped down with acetone, given a good sanding and two coats of Parker's hunters Green oil paint applied.
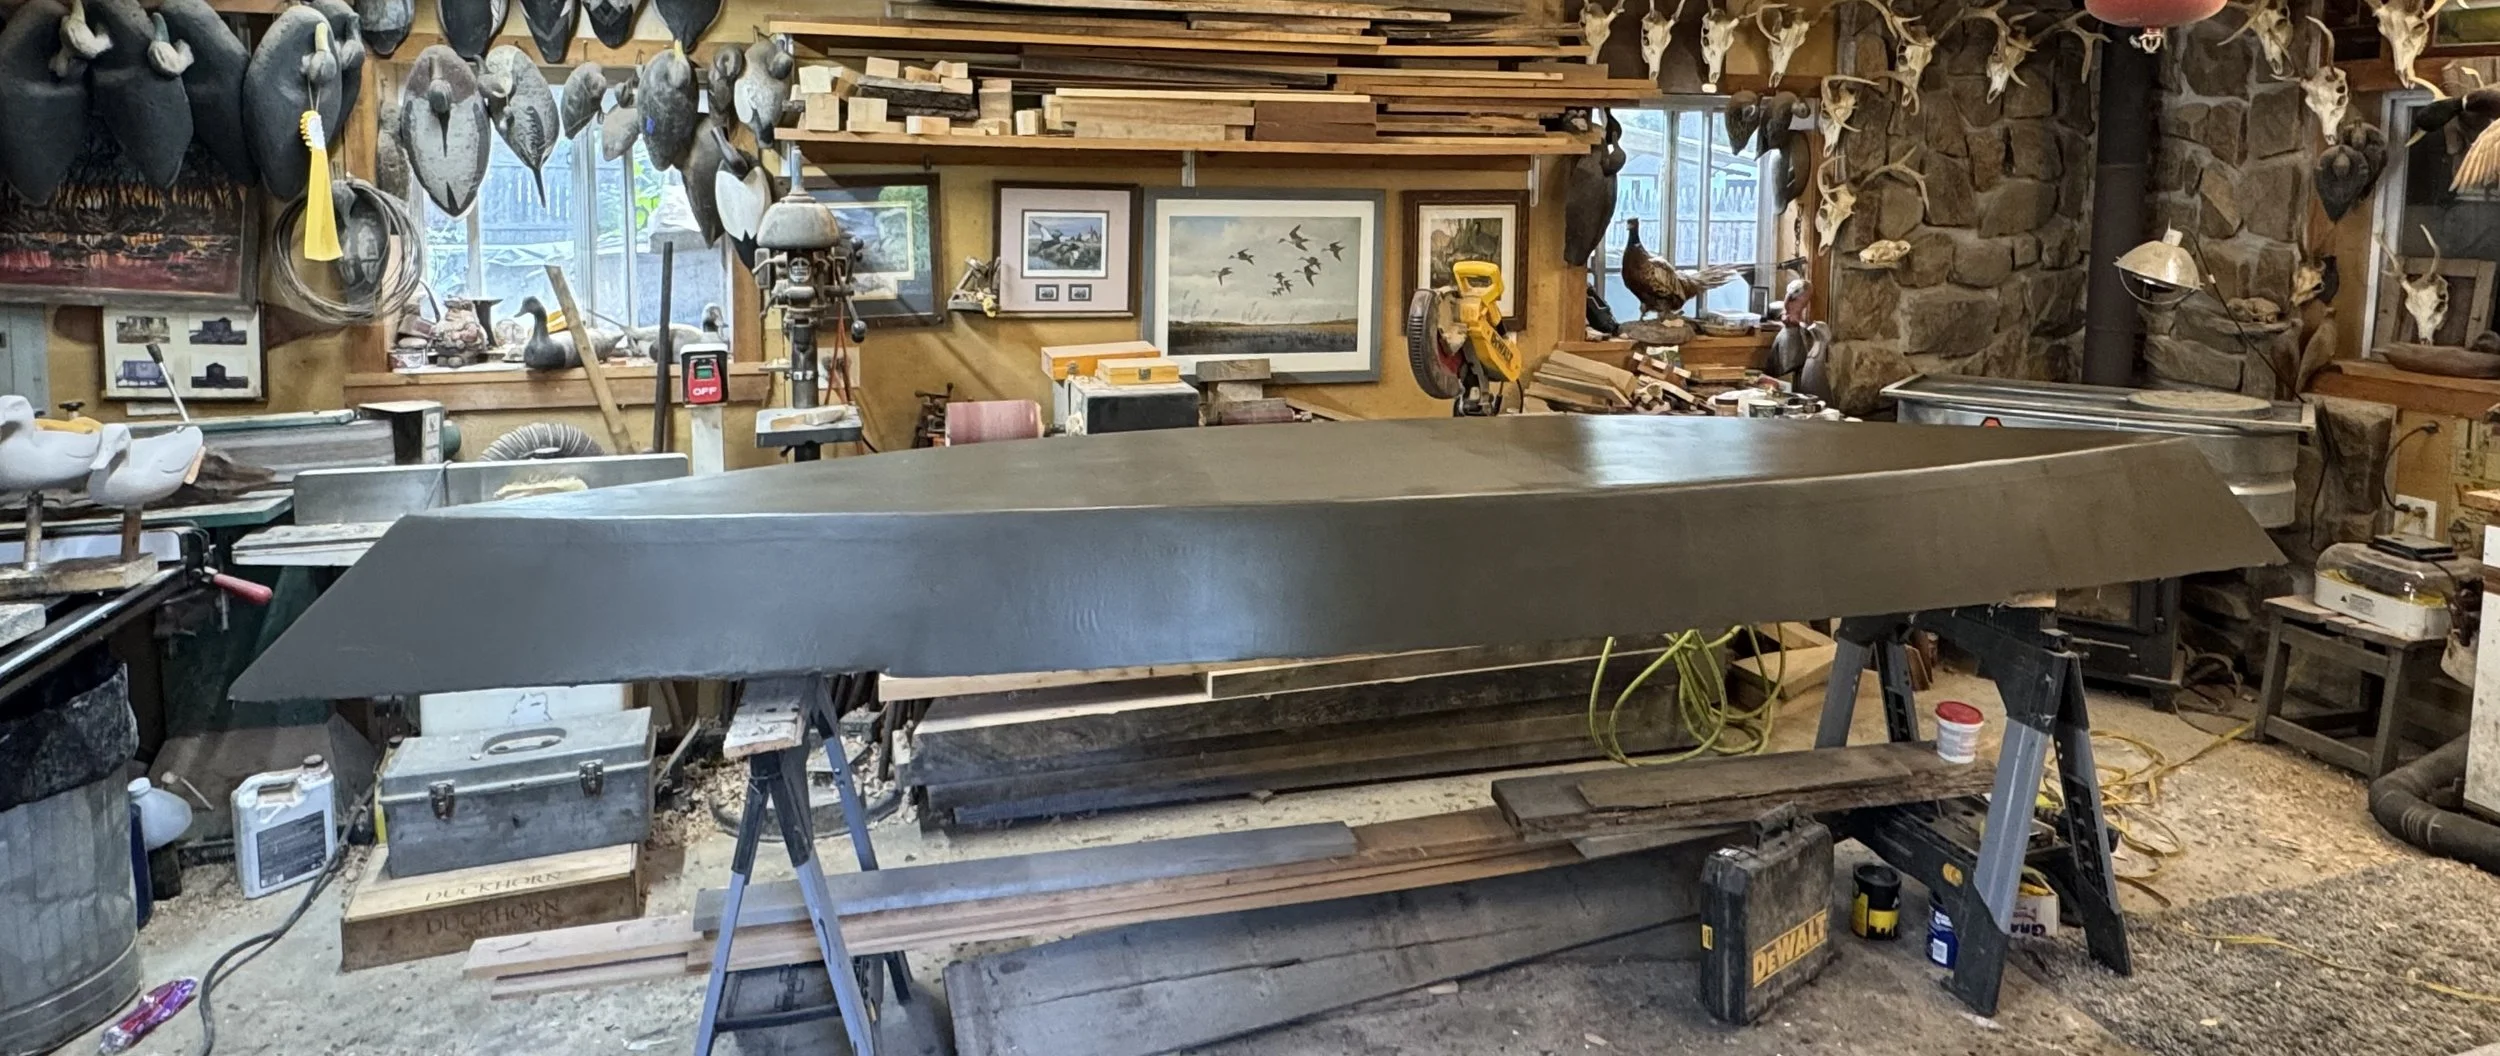
Turing the corner, Parkers Duck boat green applied to the glassed hull.
The duck boat paint was given a week to cure. Next the boat was flipped over and I would begin interior fit and finish. This included sanding the decks. after I completed that task, the decks were sealed with Raka products UV resistant epoxy. After the epoxy cured, they were given two coats of marine spar varnish. This treatment should give good protection, and allow for future touch ups if need be. I decided to add a Sassafrass toe rail to the rear deck. Though not original it was added to give purchase to the pusher standing on the rear deck. This allows one to have someplace to braces their foot while propelling the craft through the thick New Jersey rice.
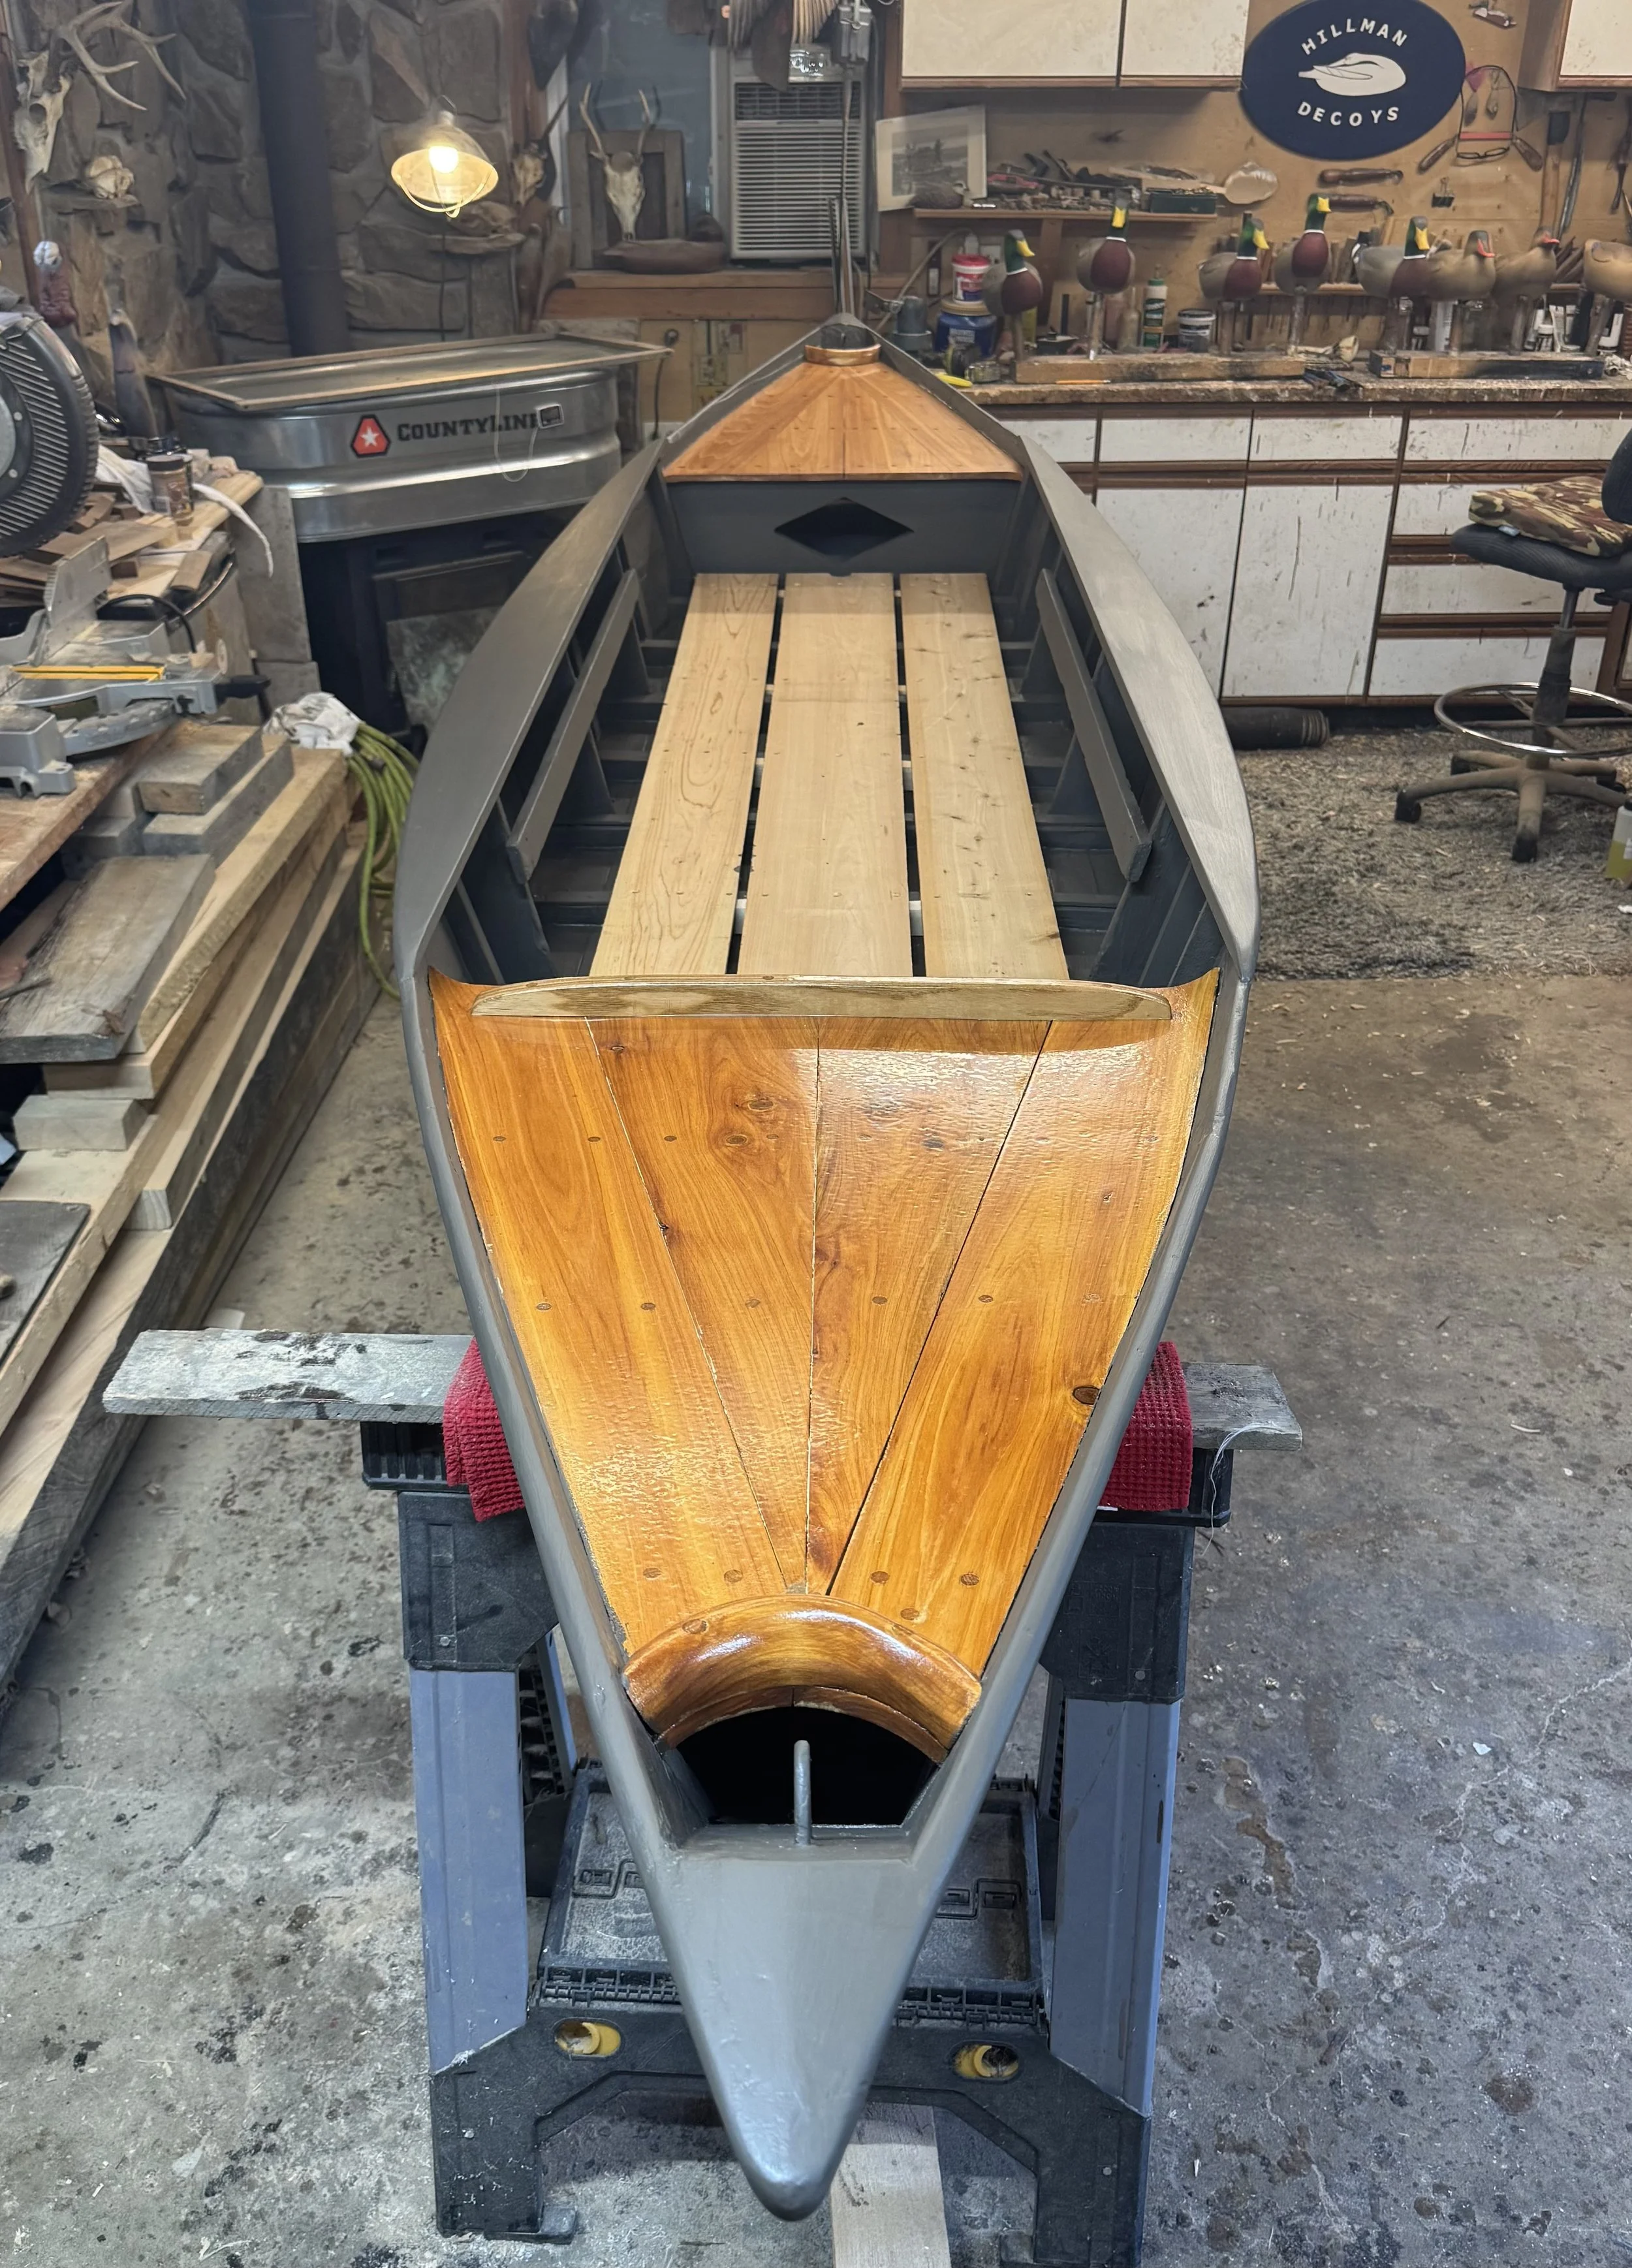
The beauty of the White cedar decking is on full display. The floor also in progress. AT 38” wide by 14’ long, she should be stable and fast in the rice.
After the decks were complete, a white cedar floor was built to fit over top of the boats planking. This gives the occupants a smooth surface to walk on without any tripping hazards.
As one nears of the end of the project, small wins accumulate, faster, and faster. I think it has something to do with finally seeing the fruits of your labor materialize before your eyes. I've always worked with my hands. However, the deep feeling of satisfaction never gets old. And I hope it never will!
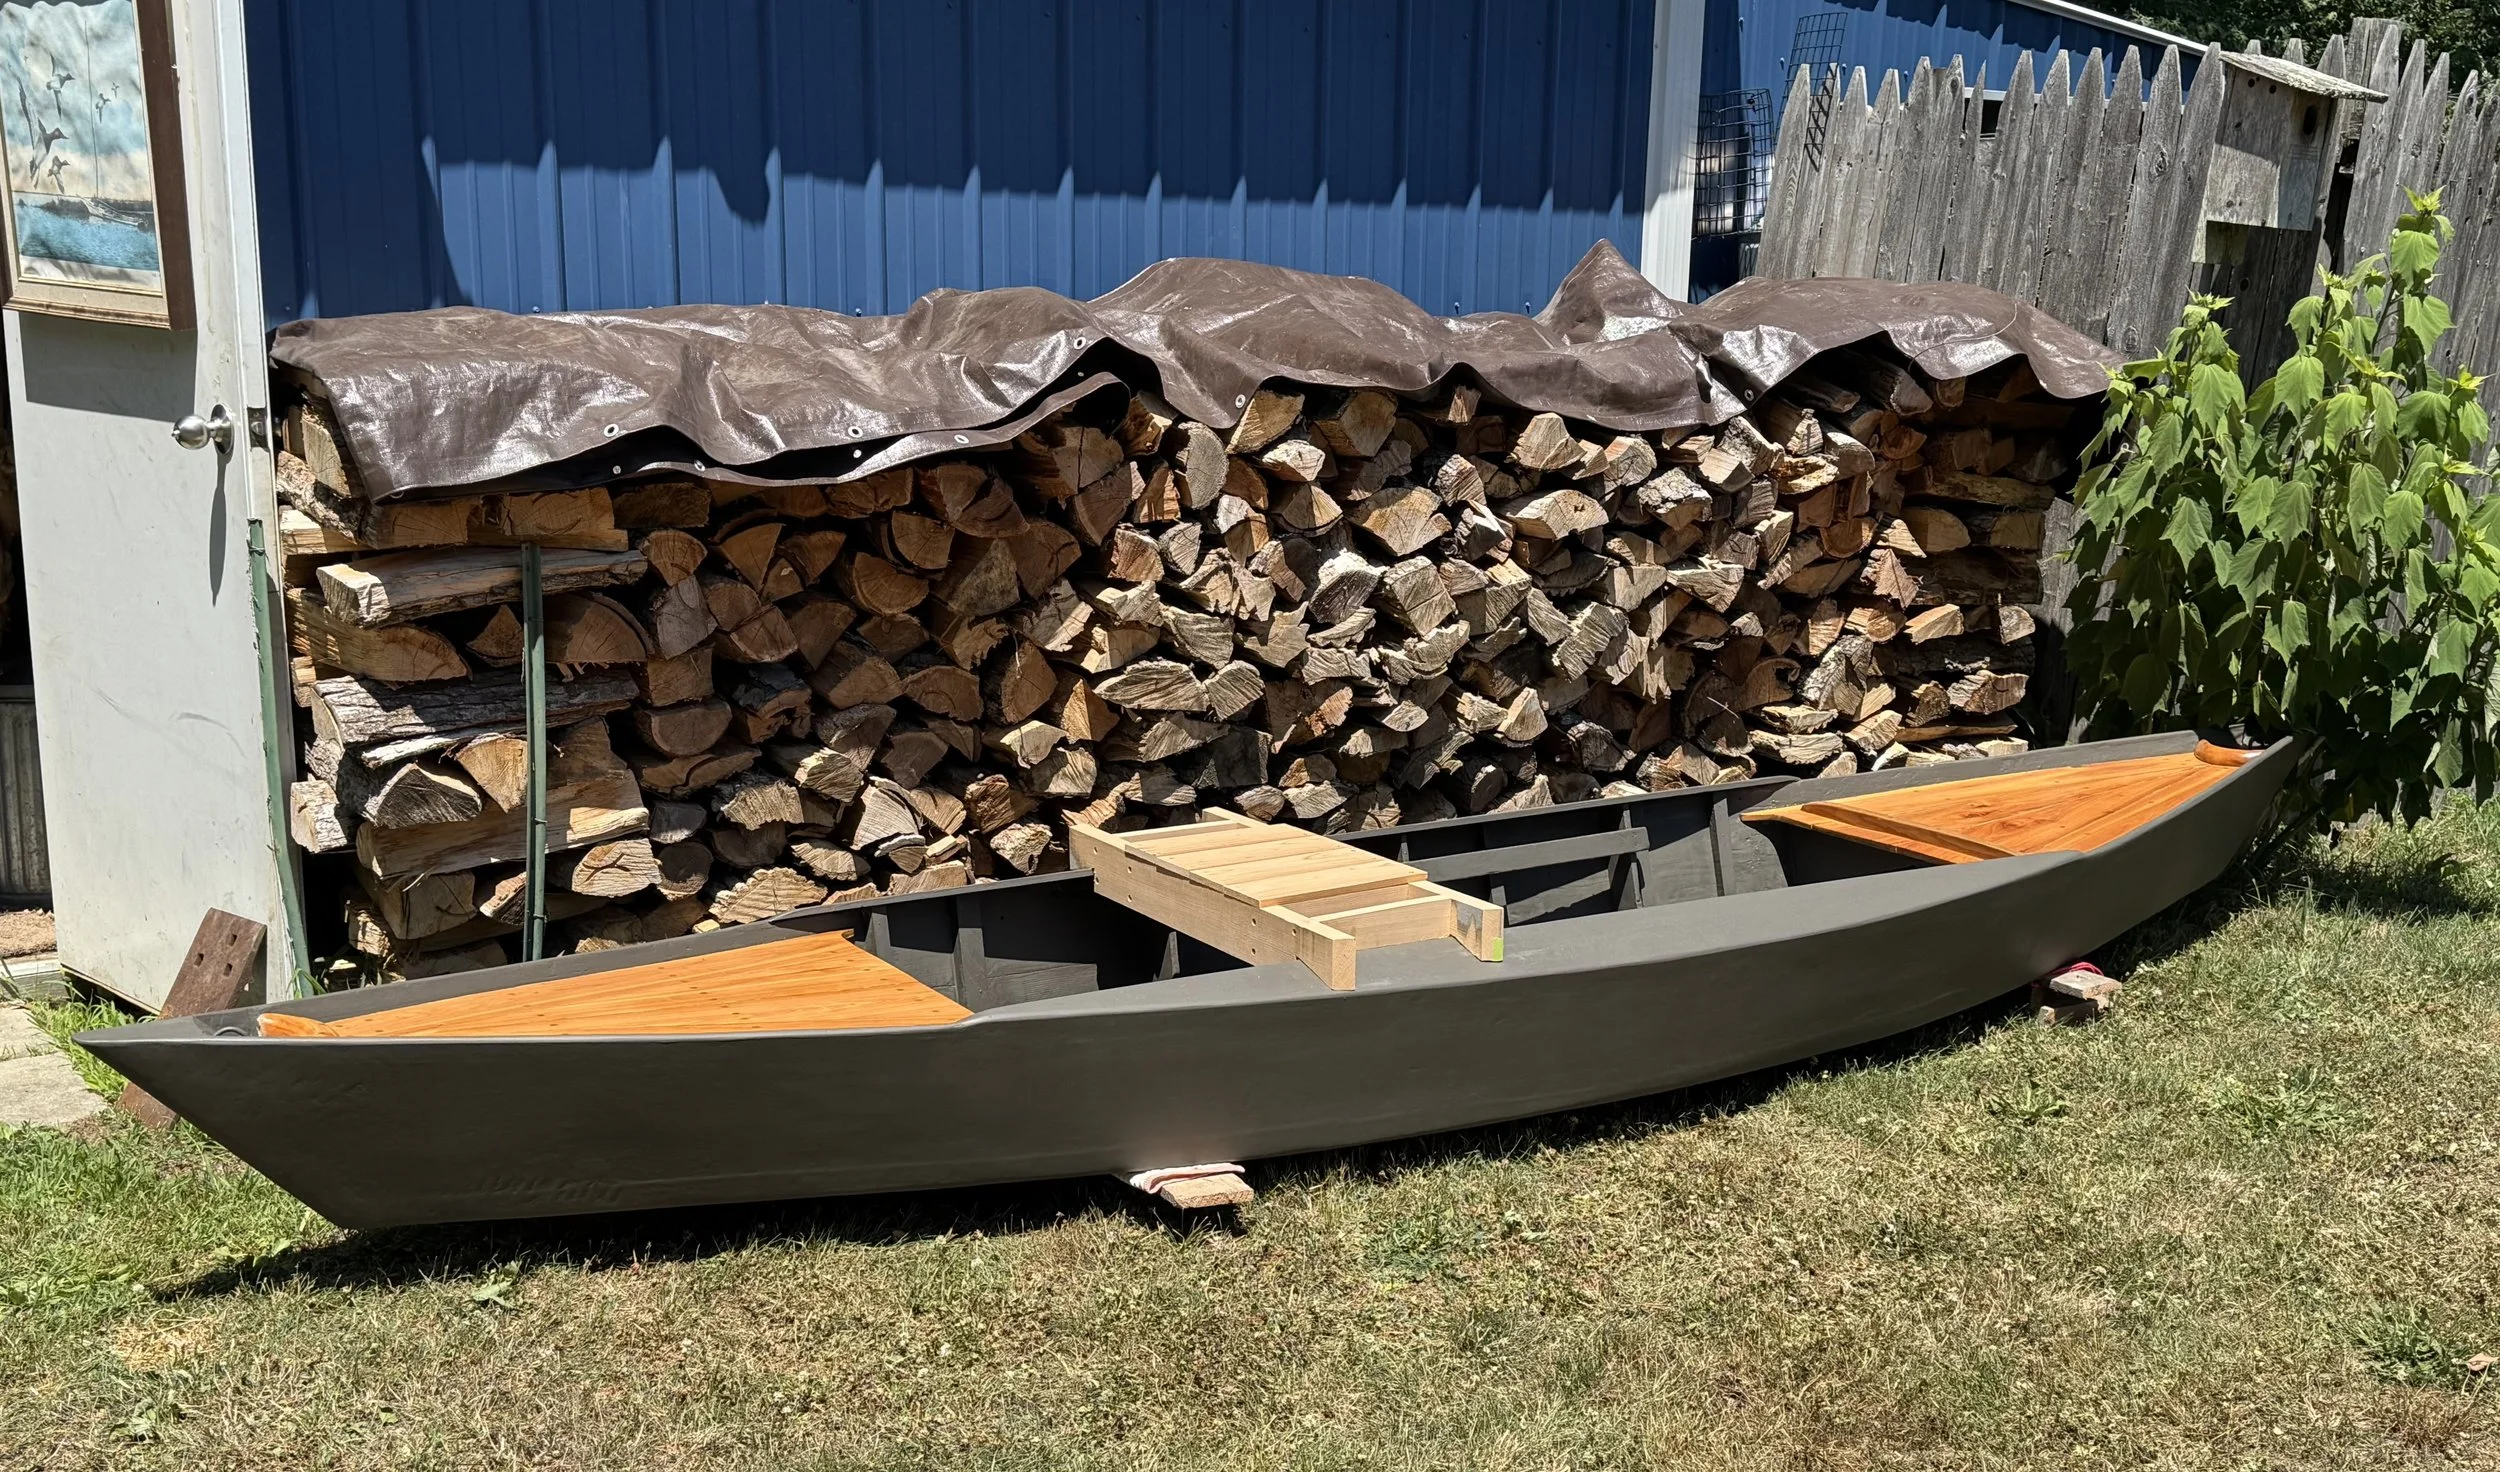
The skiff out in the Sunlight over 4th of July weekend. (Bow facing left. )
No boat is complete without somewhere to sit.
This gunning seat design was shared to me from two seasoned Rail birding friends. Frank Bennett and Rick henderson. Every seat is slightly different, but this is the arrangement I like for mine. The seat is movable, therefore, it allows one to move the gunner for better weight distribution, depending on their size.
It also has side compartments. One for bagged game, the other for shotgun shells or a drink.
The bottom of the seat is enclosed with quarter inch hardware mesh. That allows any blood, rice or water to drain through while still keeping things secure.
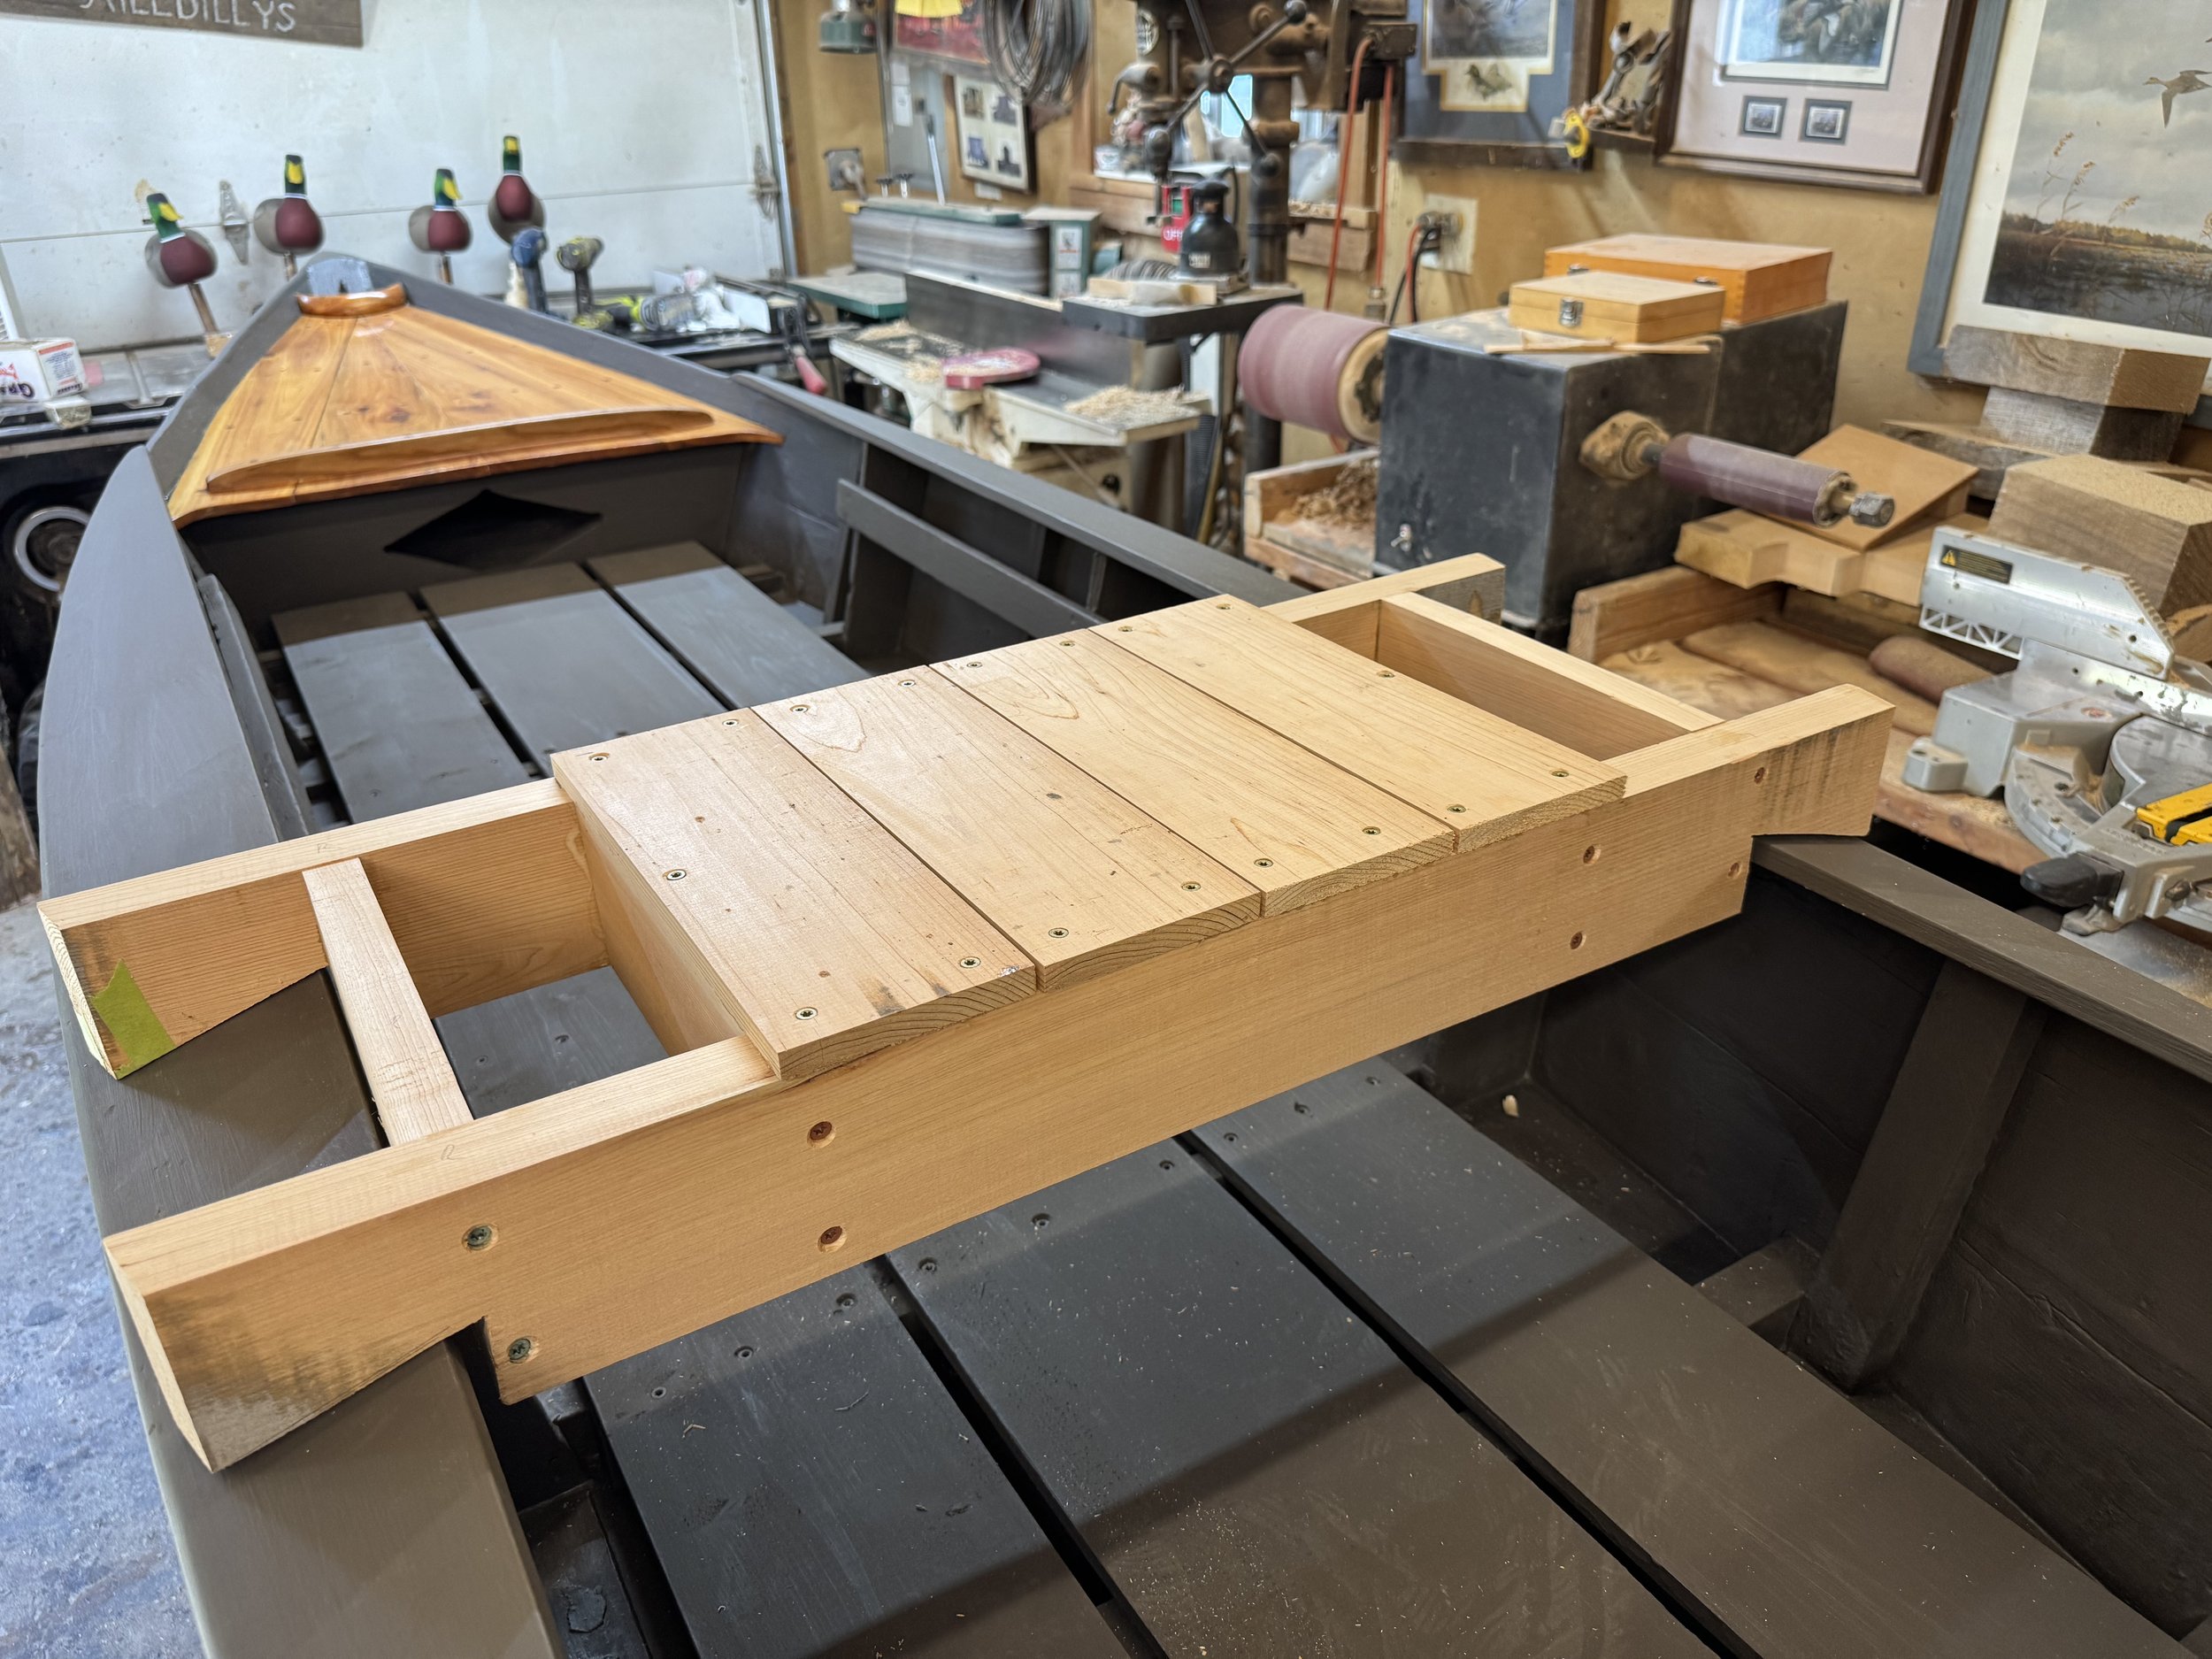
White cedar gunners seat awaiting the hardware mesh.
As each project wraps up. I often find myself thinking about the builder, the owners, and those yet to experience this historic watercraft. We are only temporary caretakers of these objects. No doubt this boat will outlive me, and perhaps even the next owner. With proper maintenance care and storage this beautiful South Jersey classic probably is not even halfway through her adventures!
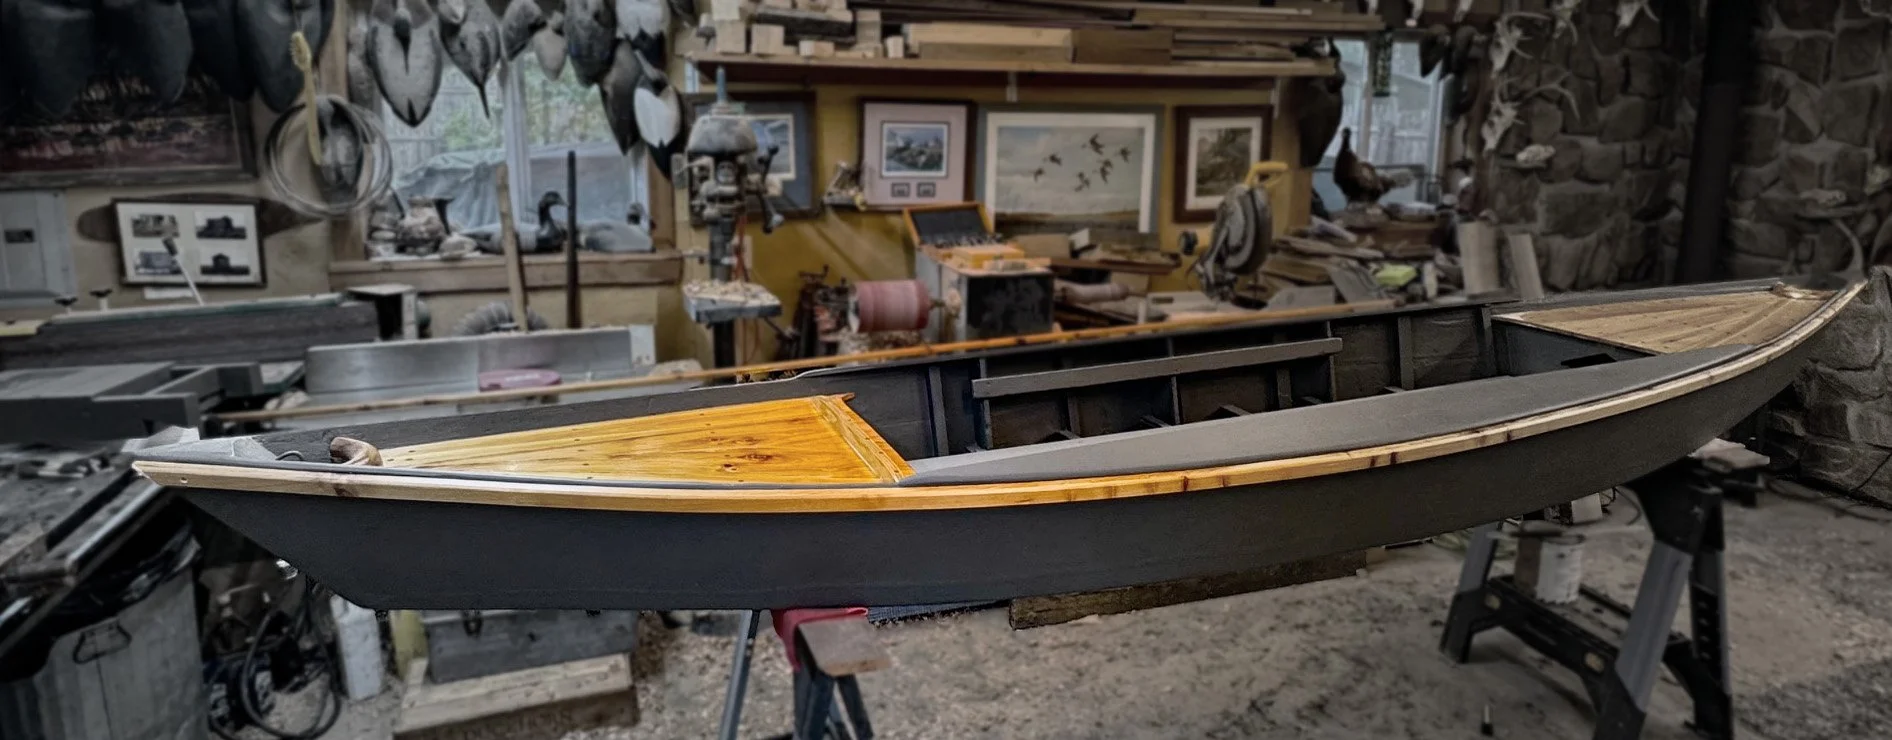
Completed railbird skiff in my shop. The final touch was to add the white cedar rub rails to the gunnels. This detail ties it all together.
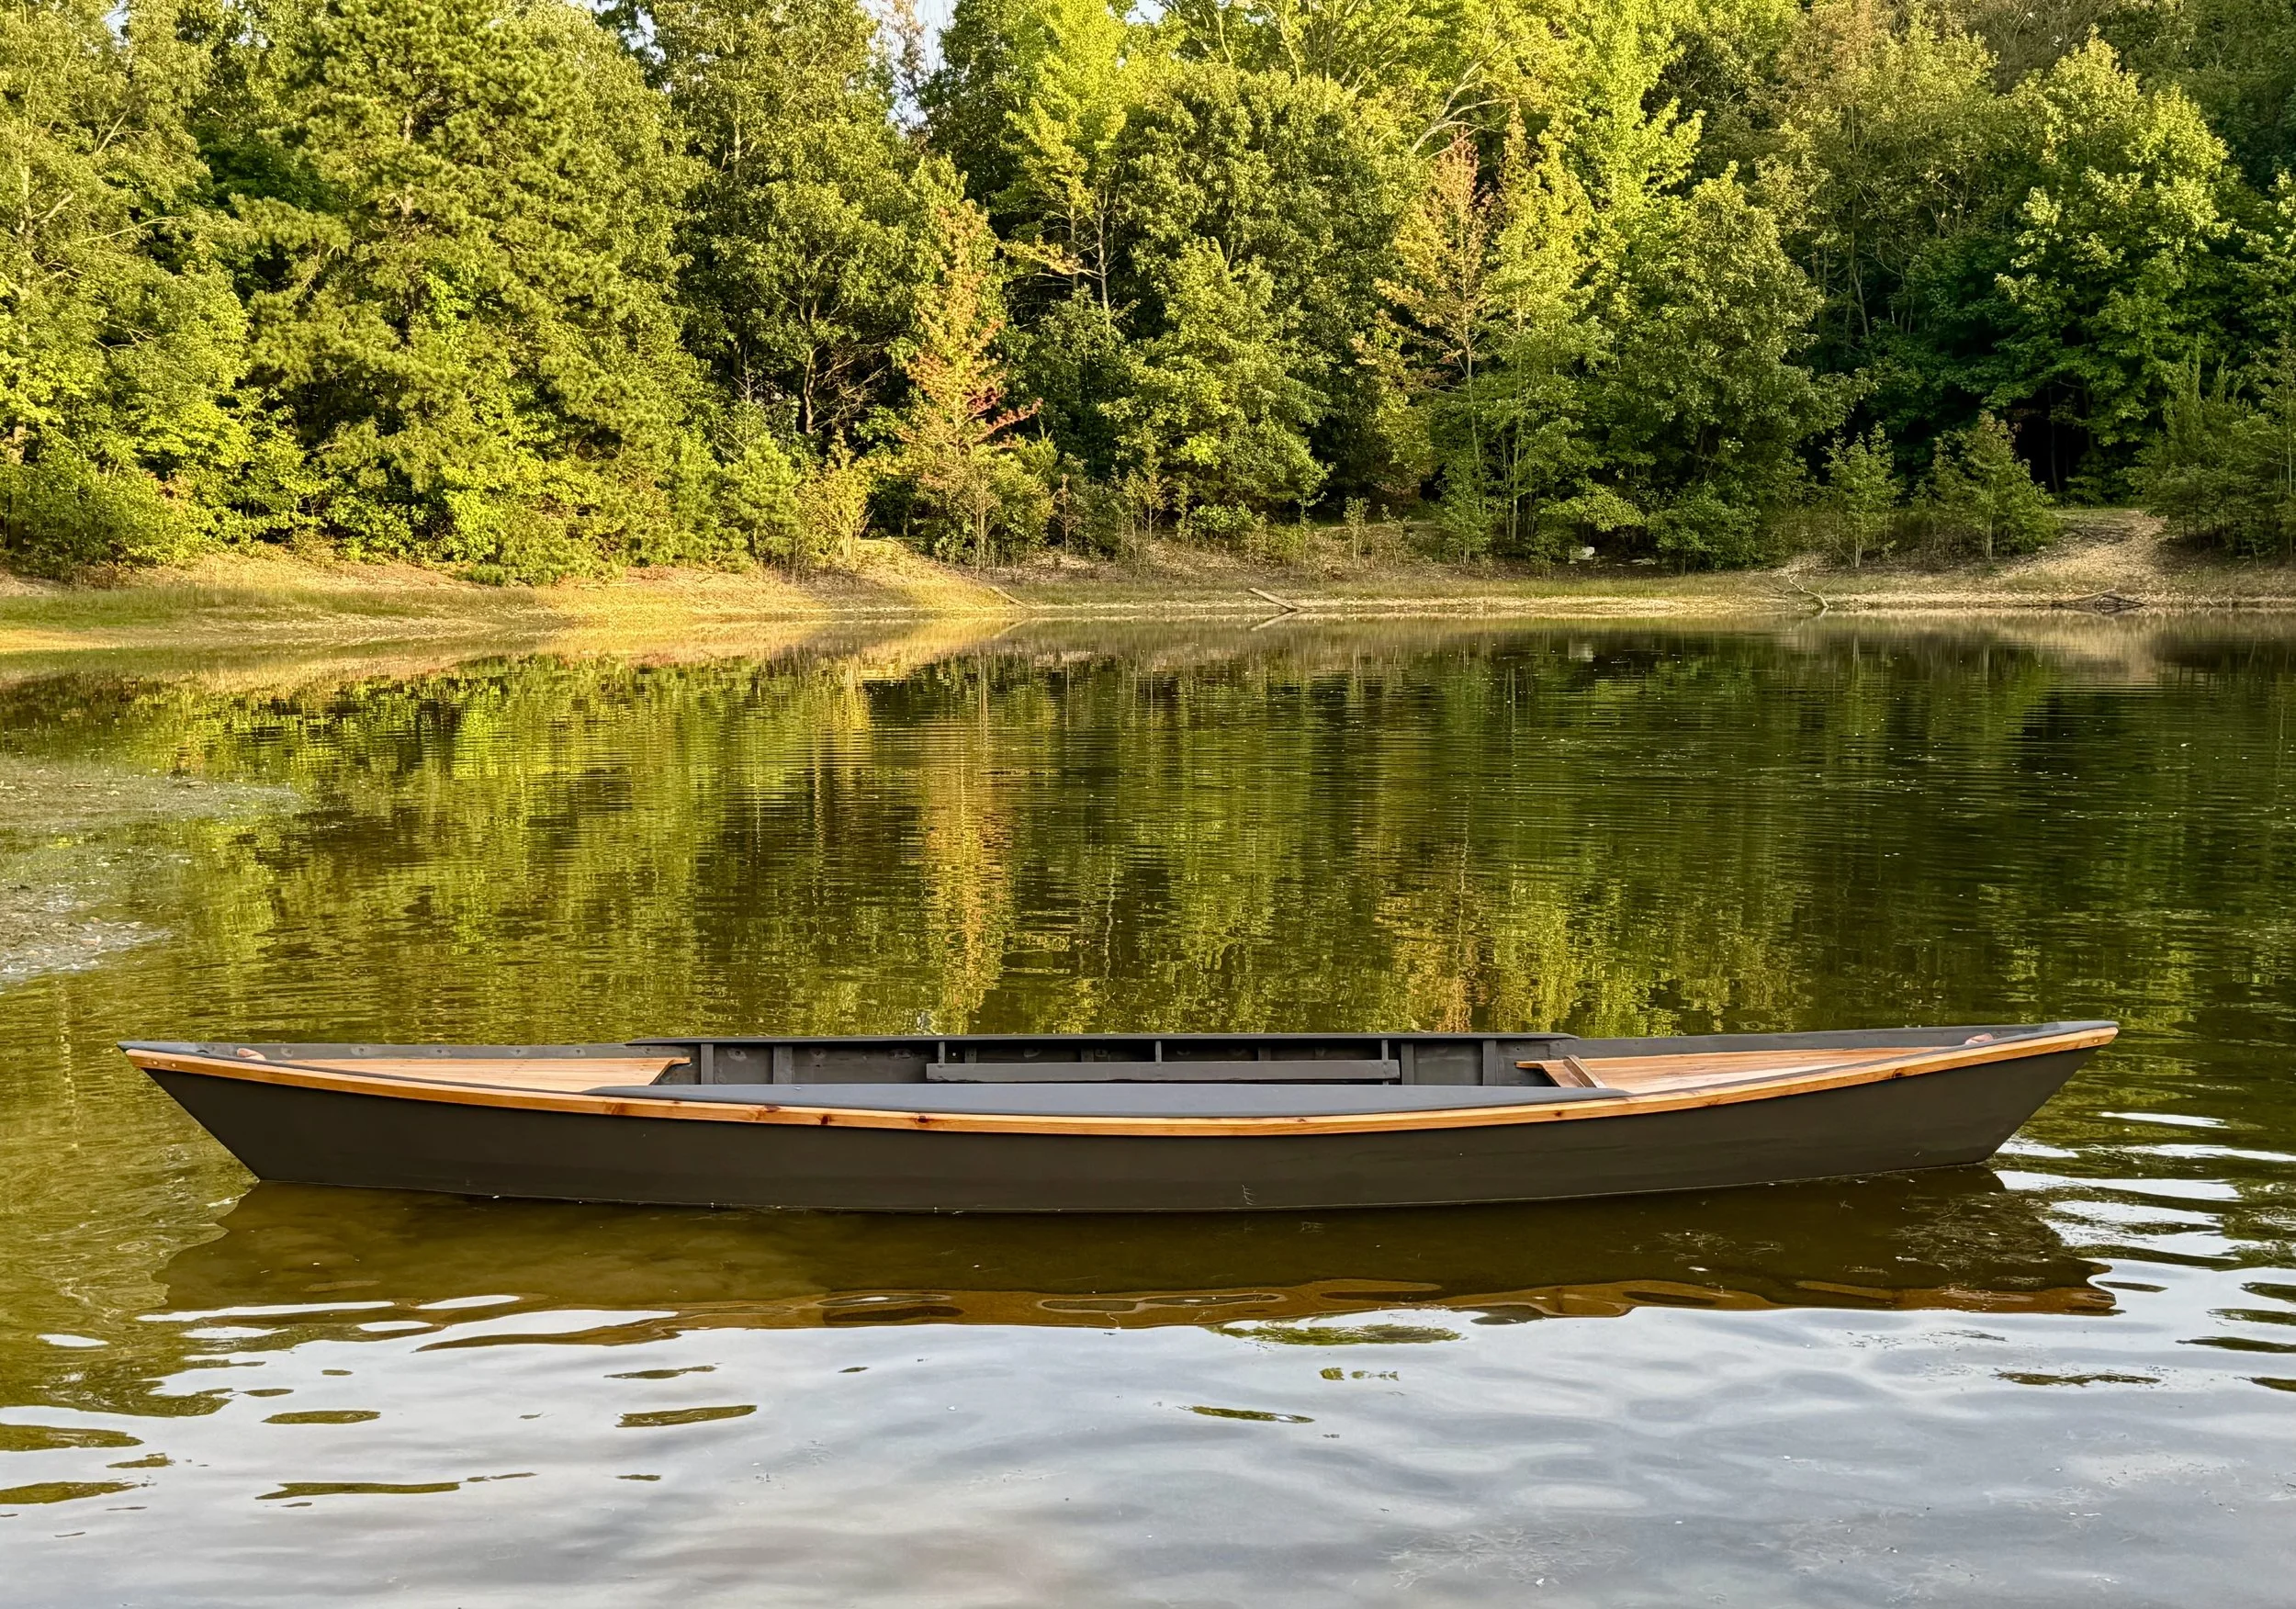
The classic New Jersey double end Railbird skiff, restored and on the water.
Thanks for reading,
Jode